Opel Frontera UBS. Service manual — part 2518

7A–30
AUTOMATIC TRANSMISSION (4L30–E)
249RW001
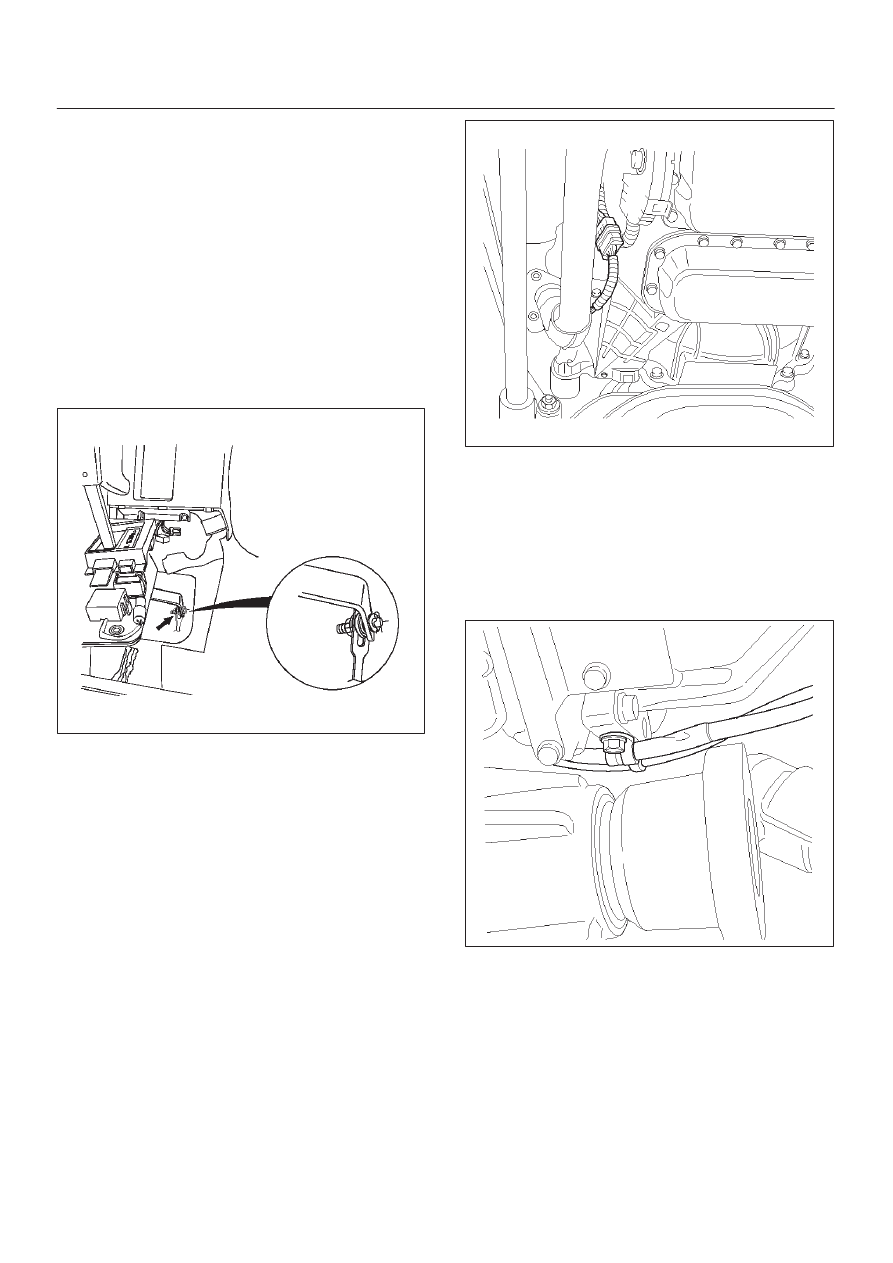
Procedure 2
a. Place selector lever in neutral.
b. Disconnect transmission harness connector from
mode switch connector.
c. Remove mode switch connector with bracket from
the transmission case.
d. Connect multimeter (resistance mode) to
terminals 1(E) and 4(H) on mode switch connector.
e. Loosen two mounting screws.
f. Rotate mode switch slightly in both directions to
determine the range (approx. 5 degrees) of
electrical contact.
g. Position mode switch in middle of contact range.
h. Tighten two mounting screws.
i. Remove multimeter and install mode switch
harness connector with bracket to the
transmission case.
j. Connect transmission harness connector to mode
switch connector.
F07RW003
7A–31
AUTOMATIC TRANSMISSION (4L30–E)
Transmission (With Transfer Case)
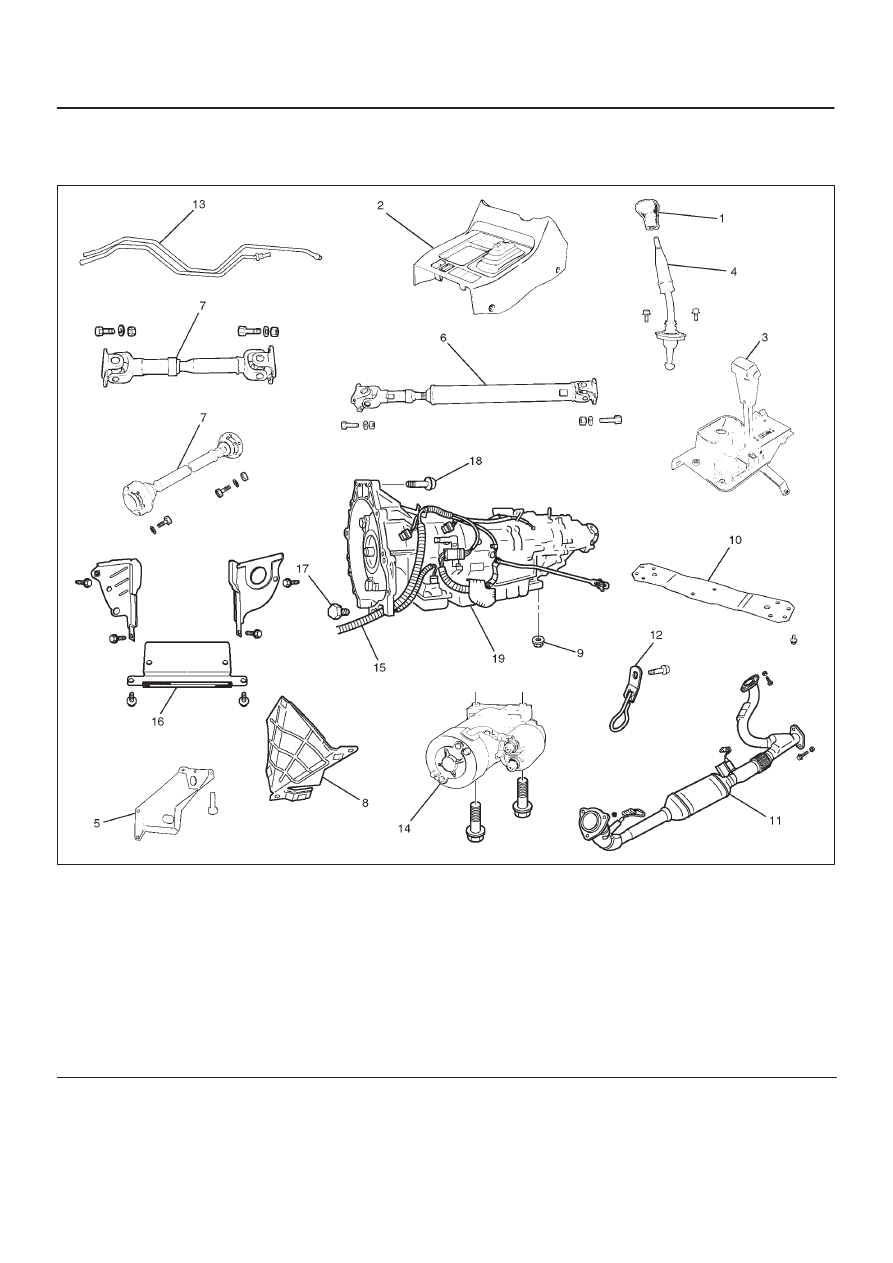
Transmission And Associated Parts
240R200029
Legend
(1) Transfer Control Lever Knob
(2) Front Console
(3) Selector Lever Assembly
(4) Transfer Control Lever
(5) Transfer Protector
(6) Rear Propeller Shaft
(7) Front Propeller Shaft
(8) Harness Protector
(9) Rear Mount Nut
(10) Third Crossmember
(11) Left Catalytic Converter Assembly
(12) Seat Belt Tension Rod
(13) Transmission Oil Cooler Pipe
(14) Starter
(15) Transmission Harness Connector
(16) Under Cover
(17) Torque Converter Bolt
(18) Engine Transmission Bolt
(19) Transmission Assembly (With Transfer Case)
7A–32
AUTOMATIC TRANSMISSION (4L30–E)
Removal
NOTE: Before remove transmission and transfer
assembly from vehicle, change the tansfer mode to 2WD
using push button on dash panel.
1. Remove engine hood.
2. Disconnect battery ground cable.
3. Remove transfer control lever knob (1) and
disconnect wiring harness connectors, then remove
front console (2).
4. Remove selector lever assembly (3).
5. Remove transfer control lever (4).
6. Remove transfer protector (5).
7. Disconnect shift control rod from the selector lever
assembly side.
256RW013
8. Remove rear propeller shaft (6).
9. Remove front propeller shaft (7).
10. Remove harness protector (8).
11. Support transfer case with a jack and remove two rear
mount nuts (9) from the 3rd crossmember side.
12. Remove eight third crossmember bolts and third
crossmember (10).
13. Remove front exhaust silencer mounting nuts.
14. Remove left seat belt tension rod.
15. Disconnect two left side oxygen sensor connectors
from the transmission harness.
150RW002
16. Remove left catalytic converter assembly (11).
17. Loosen right catalytic converter nuts to exhaust
manifold.
NOTE: This will make the next steps easier.
18. Disconnect transmission oil cooler pipe (13) from A/T
side.
19. Remove oil pipe clamp from torque converter
housing bracket.
253RY001
20. Loosen oil pipe clamp bolt at the engine mount side.
21. Remove starter (14).
7A–33
AUTOMATIC TRANSMISSION (4L30–E)
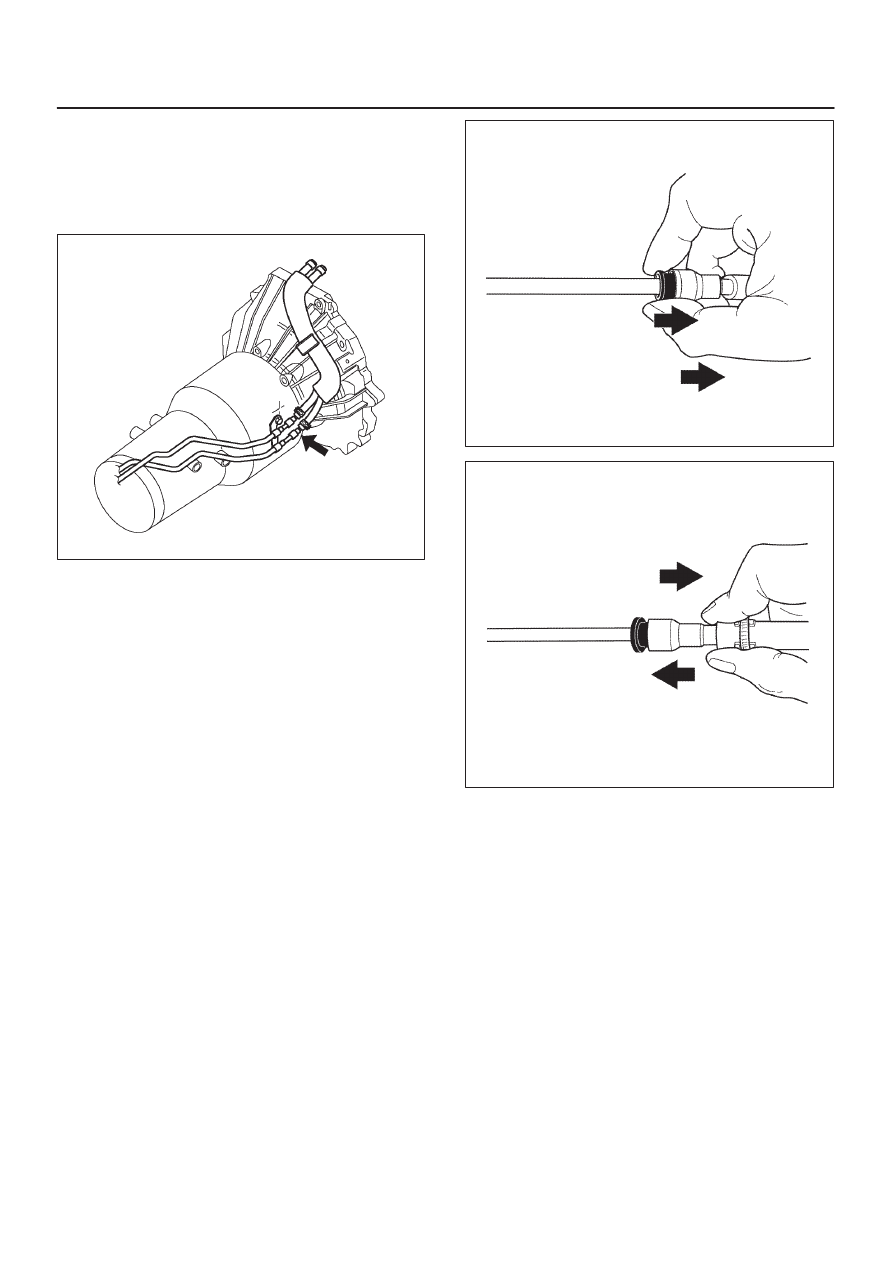
22. Disconnect fuel pipe clamp brackets from
transmission side.
Fuel hose connector removal procedure
If removal of the fuel hose connector is required for
transmission servicing and/or replacement, follow the
steps below.
141R200001
NOTE:
D
An O-ring is used as a seal between the fuel pipe and
the connector. Take care not to damage the contact
surfaces during the removal procedure. Do not allow
the surface to become contaminated with dirt or other
foreign material.
D
Perform the entire removal procedure with your
hands. Do not use tools.
1. Separating the connector and fuel pipe
1. Clean the fuel pipe and connector to remove
mud and other dirt.
2. Pull the black plastic piece toward the
connector. Hold the piece near the connector.
Pull the connector from the fuel pipe.
If the connector and fuel pipe are stuck togeth-
er, jiggle the connector back and forth to loosen
the connector. Do not yank the connector from
the fuel pipe.
141RY00002
141RY00003
Нет комментариевНе стесняйтесь поделиться с нами вашим ценным мнением.
Текст