Opel Frontera UBS. Service manual — part 933
1B–126 AIR CONDITIONING
ON-VEHICLE SERVICE
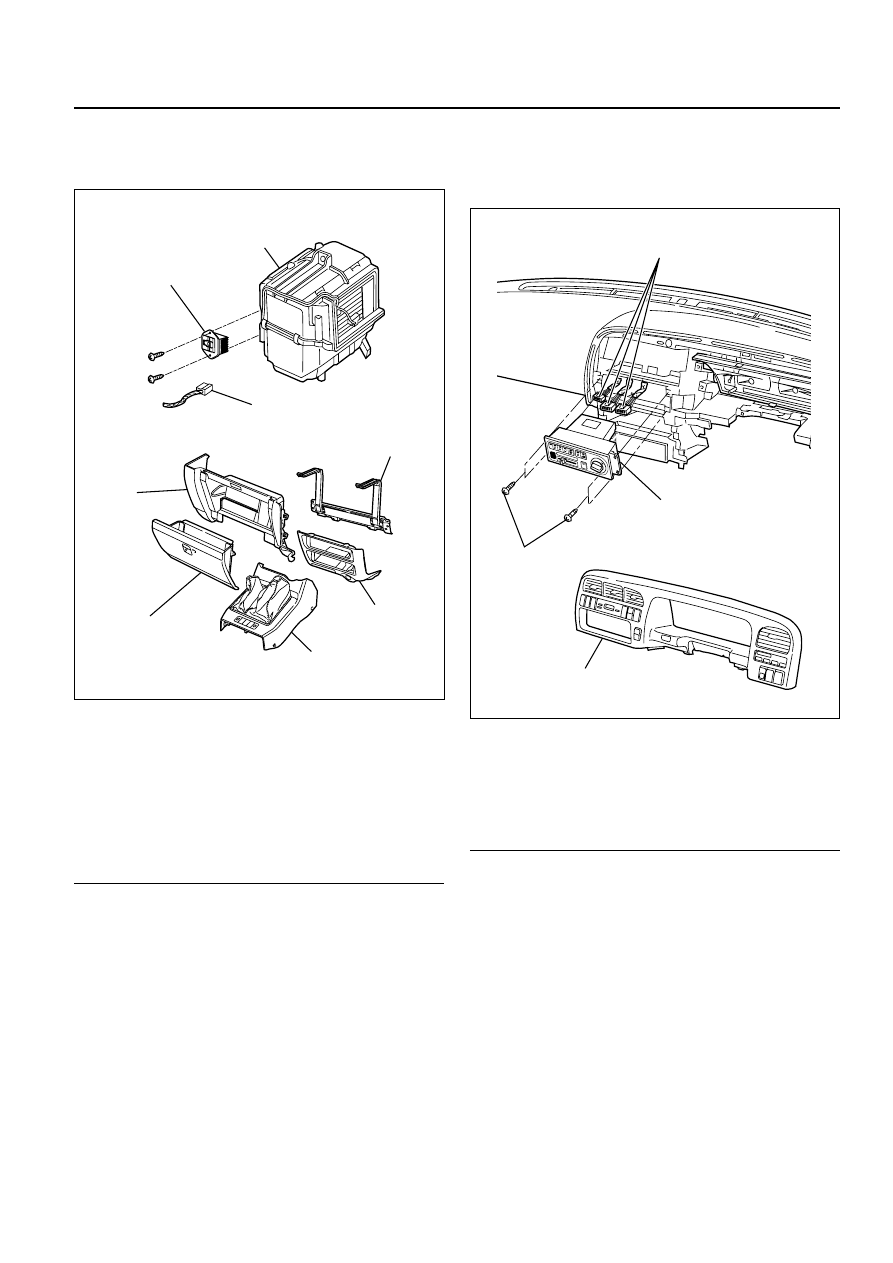
Power Transistor
Legend
(1)
Evaporator Assembly
(2)
Passenger Knee Bolster Reinforcement
(3)
Lower Cluster
(4)
Front Console
(5)
Glove Box
(6)
Instrument Panel Passenger Lower Cover
(7)
Power Transistor Connector
(8)
Power Transistor
Removal
1. Remove front console.
2. Remove lower cluster.
3. Remove glove box.
4. Remove instrument panel passenger lower
cover.
5. Remove passenger knee bolster reinforcement.
6. Disconnect the power transistor connector.
7. Remove power transistor.
Installation
To install, follow the removal step in the reverse
order.
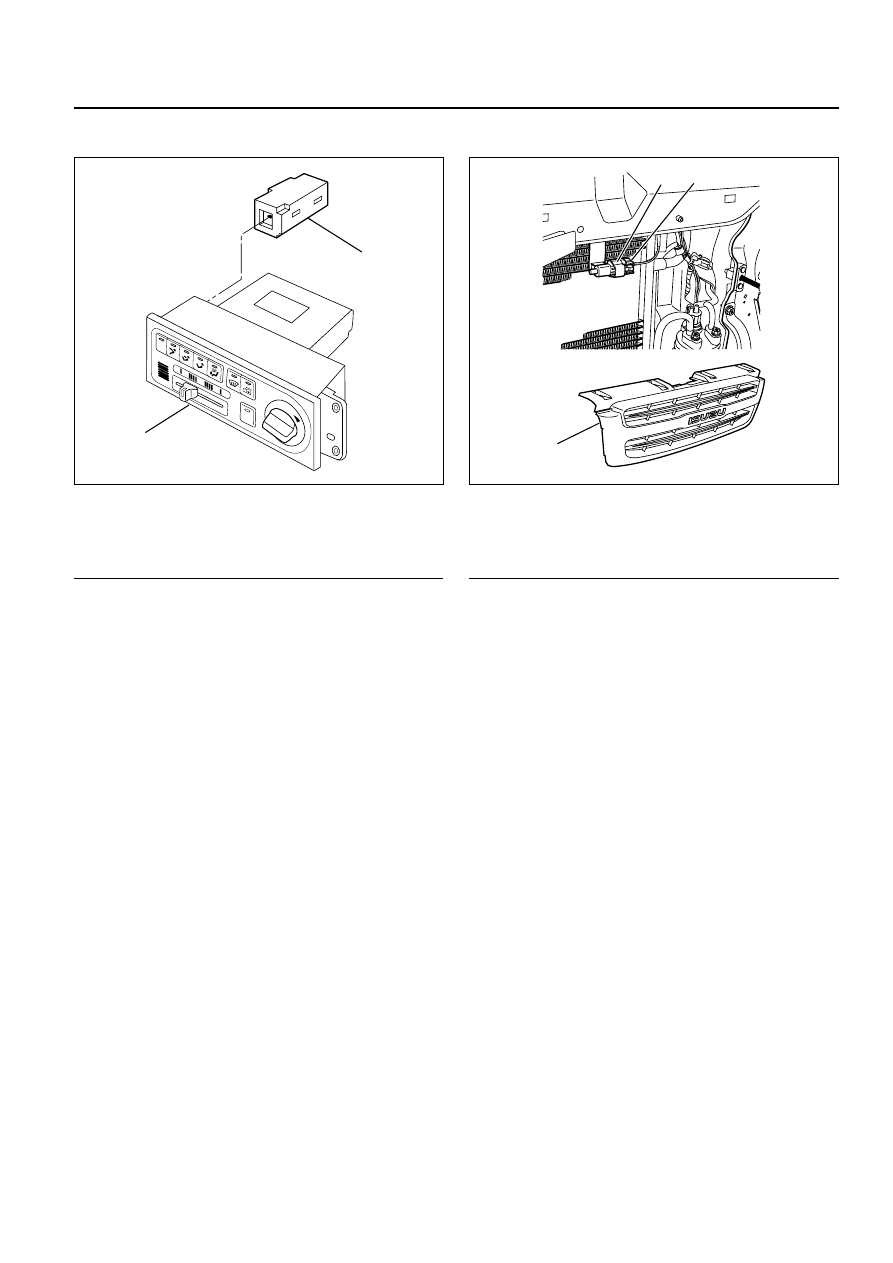
Automatic Heater/Air Conditioner Control
Unit
Legend
(1)
Connector
(2)
Automatic Heater / Air Conditioner Control
Unit
(3)
Instrument Panel Cluster
(4)
Set Screw
Removal
1. Disconnect the battery ground cable.
2. Remove instrument panel cluster.
•
Refer to Instrument Panel Assembly in Body
Structure section.
3. Disconnect the automatic heater / air conditioner
control unit connector.
4. Remove automatic heater/ air conditioner
control unit.
Installation
To install, follow the removal step in the reverse
order.
7
6
5
4
3
2
8
1
874RY00001
This illustration is based on RHD
20 2
5 3
0
ZEXEL
AUTO
A/C
OF
F AUTO LO
HI
3
2
4
1
865RY00007
This illustration is based on RHD
AIR CONDITIONING 1B–127
In Car Sensor
Legend
(1)
In Car Sensor
(2)
Automatic Heater / Air Conditioner Control
Unit
Removal
1. Disconnect the battery ground cable.
2. Remove the automatic heater / air conditioner
control unit.
•
Refer to the automatic heater / air conditioner
control unit section.
3. Remove in car sensor.
Installation
To install, follow the removal step in the reverse
order.
Ambient Sensor
Legend
(1)
Ambient Sensor
(2)
Sensor Connector
(3)
Radiator Grill
Removal
1. Disconnect the battery ground cable.
2. Remove radiator grille.
•
Refer to Radiator Grille in Body Structure
section.
3. Disconnect the ambient sensor connector.
4. Remove the ambient sensor.
Installation
To install, follow the removal step in the reverse
order.
20
25
30
ZEX
EL
AUTO
A/C
OFF
AUTO
LO
HI
2
1
865RY00006
1
2
3
875RY00001

1B–128 AIR CONDITIONING
Sun Sensor
Legend
(1)
Sun Sensor
Removal
1. Disconnect the battery ground cable.
2. Remove the sun sensor.
3. Disconnect the sun sensor connector.
Installation
To install, follow the removal step in the reverse
order.
Electronic Thermostat
Legend
(1)
Duct Sensor
(2)
Thermostat Assembly
(3)
Evaporator Assembly
Removal
1. Disconnect the battery ground cable.
2. Remove evaporator assembly.
•
Refer to Evaporator Assembly section.
3. Remove electronic thermostat.
Installation
To install, follow the removal step in the reverse
order.
1
826RY00001
1
3
2
874RY00002
This illustration is based on RHD
This illustration is based on RHD
AIR CONDITIONING 1B–129
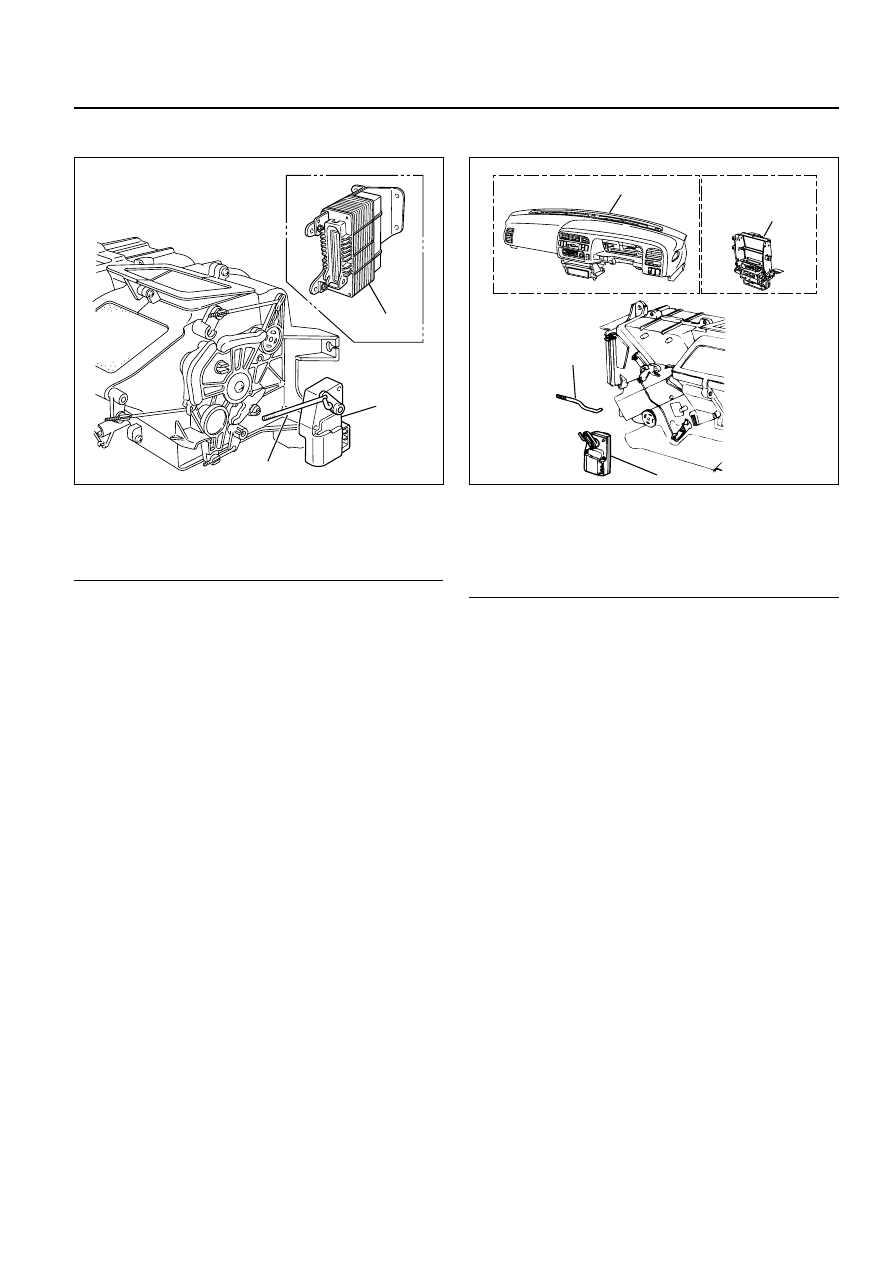
Mode Actuator
Legend
(1)
A/T Control Unit
(2)
Mode Actuator
(3)
Actuator Rod
Removal
1. Disconnect the battery ground cable.
2. Remove the A/T control unit.
•
The connector shall remain connected.
3. Remove the actuator rod.
4. Remove the mode actuator.
Installation
To install, follow the removal step in the reverse
order.
MIX Actuator
Legend
(1)
Instrument Panel Assembly
(2)
Instrument Panel Center Bracket
(3)
Actuator Rod
(4)
Mix Actuator
Removal
1. Disconnect the battery ground cable.
2. Remove the instrument panel assembly.
•
Refer to the Instrument Panel Assembly in
Body Structure section.
3. Remove the instrument panel center bracket.
4. Remove the actuator rod.
5. Remove the mix actuator.
Installation
To install, follow the removal step in the reverse
order.
2
1
3
860RW030
2
3
4
1
20 2
5 30
AUTO
A/C
OFF
AUTO
LO
HI
860RY00004
This illustration is based on RHD
This illustration is based on RHD
Нет комментариевНе стесняйтесь поделиться с нами вашим ценным мнением.
Текст