Opel Frontera UBS. Service manual — part 1577
8B–10 WIPER/WASHER SYSTEM
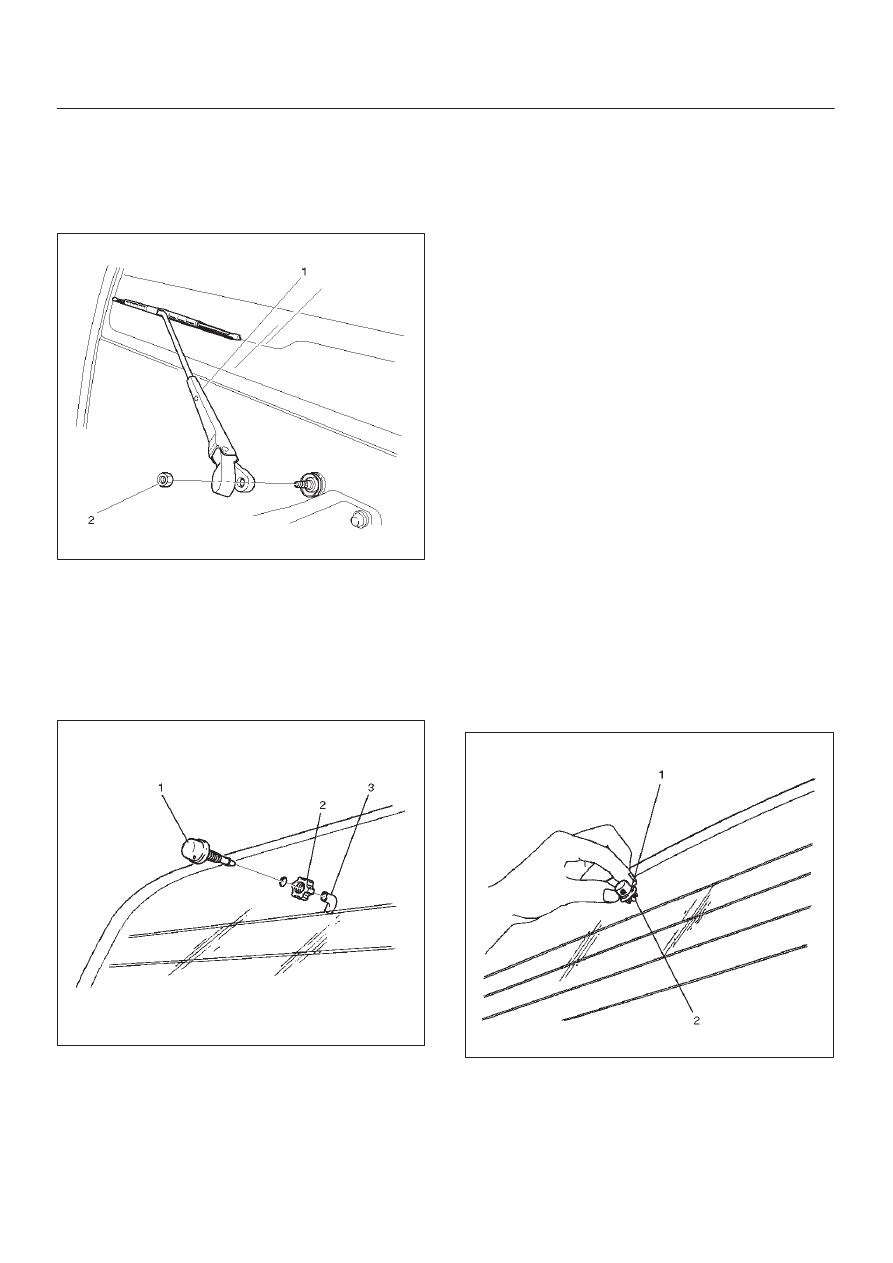
Rear Wiper Arm/Blade
Removal
1. Remove the arm nut(2).
2. Remove the wiper arm/blade(1).
885RS008
Installation
Refer to the installation steps of the Rear Wiper Motor in
Wiper/Washer System section.
Rear Washer Nozzle
Removal
1. Disconnect the hose(3).
2. Remove the lock nut(2), and then remove the washer
nozzle(1).
885RS005
Installation
To install, follow the removal steps in the reverse order.
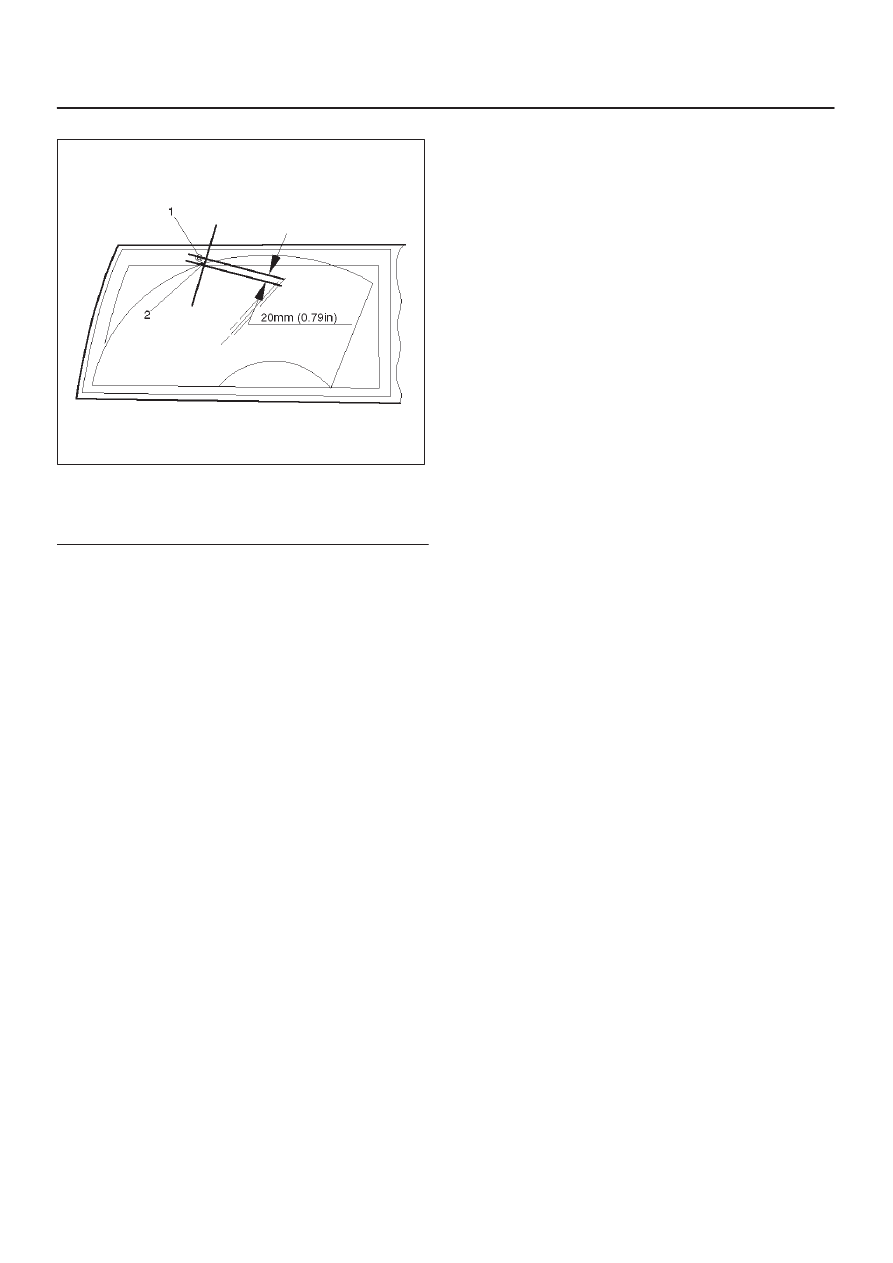
Rear Washer Nozzle Angle
Adjustment
Loosen the lock nut(2) of the washer nozzle(1) to adjust
the injection angle of the cleaning fluid, and then retighten
the lock nut(2).
885RS004
WIPER/WASHER SYSTEM
8B–11
Rear Washer Spray Pattern
885RS003
Legend
(1) Washer Nozzle
(2) Spray Target
Rear Wiper Blade Rubber
Removal and Installation
Refer to the Windshield Wiper Blade Rubber in this
section.
Headlight Wiper/Washer
General Description
The circuit consists of the starter switch, headlight
wiper/washer switch, headlight wiper motor and washer
motor. By pushing the headlight wiper/washer switch with
the starter switch on, the wiper will make 5 strokes with
washer solution applied between each of the first 4
strokes, regardless of the length of time the switch is held
down.
The washer nozzle is installed to the wiper blade, and the
tank to which the washer motor is installed shared among
the headlight washer and the windshield washer.

8B–12 WIPER/WASHER SYSTEM
Headlight Wiper and Washer Switch
Removal
1. Disconnect the battery ground cable.
2. Remove the front console assembly(1).
Refer to the Instrument Panel Assembly in Body
Structure section.
3. Remove the lower cluster assembly(2).
Refer to the Instrument Panel Assembly in Body
Structure section.
4. Remove the instrument panel driver lower cover(3).
Refer to the Instrument Panel Assembly in Body
Structure section.
821RW024
5. Remove the instrument panel cluster assembly(4).
Refer to the Instrument Panel Assembly in Body
Structure section.
6. Disconnect the connector and push the lock from the
back side of the instrument panel cluster assembly to
remove the headlight wiper switch(5).
825RW245
Installation
To install, follow the removal steps in the reverse order,
noting the following point:
1. Push the switch with your fingers until it locks
securely.
WIPER/WASHER SYSTEM
8B–13
Headlight Wiper Arm & Blade
Removal
1. Remove the wiper arm nut and the wiper arm &
blade(1).
2. Disconnect the washer hose.
808RW001
Installation
To install, follow the removal steps in the reverse order,
noting the following point:
1. Tighten the wiper arm nut to the specified torque.
Torque: 5 N·m (0.5 kg·m/44 Ib ft)
Headlight Wiper Motor
Removal
1. Disconnect the battery ground cable.
2. Remove the headlight wiper arm/blade(1).
3. Remove the headlight assembly(2).
Refer to the Headlight removal steps in this section.
4. Remove 2 nuts and screws, the remove headlight
wiper motor(3).
808RW002
Installation
To install, follow the removal steps in the reverse order,
noting the following point:
1. Make sure that the motor stops at auto stop position
prior to installing the wiper arm & blade to the motor
shaft.
Нет комментариевНе стесняйтесь поделиться с нами вашим ценным мнением.
Текст