Opel Frontera UBS. Service manual — part 1003
4A2B–28
DIFFERENTIAL (REAR 244mm)
Limited Slip Differential
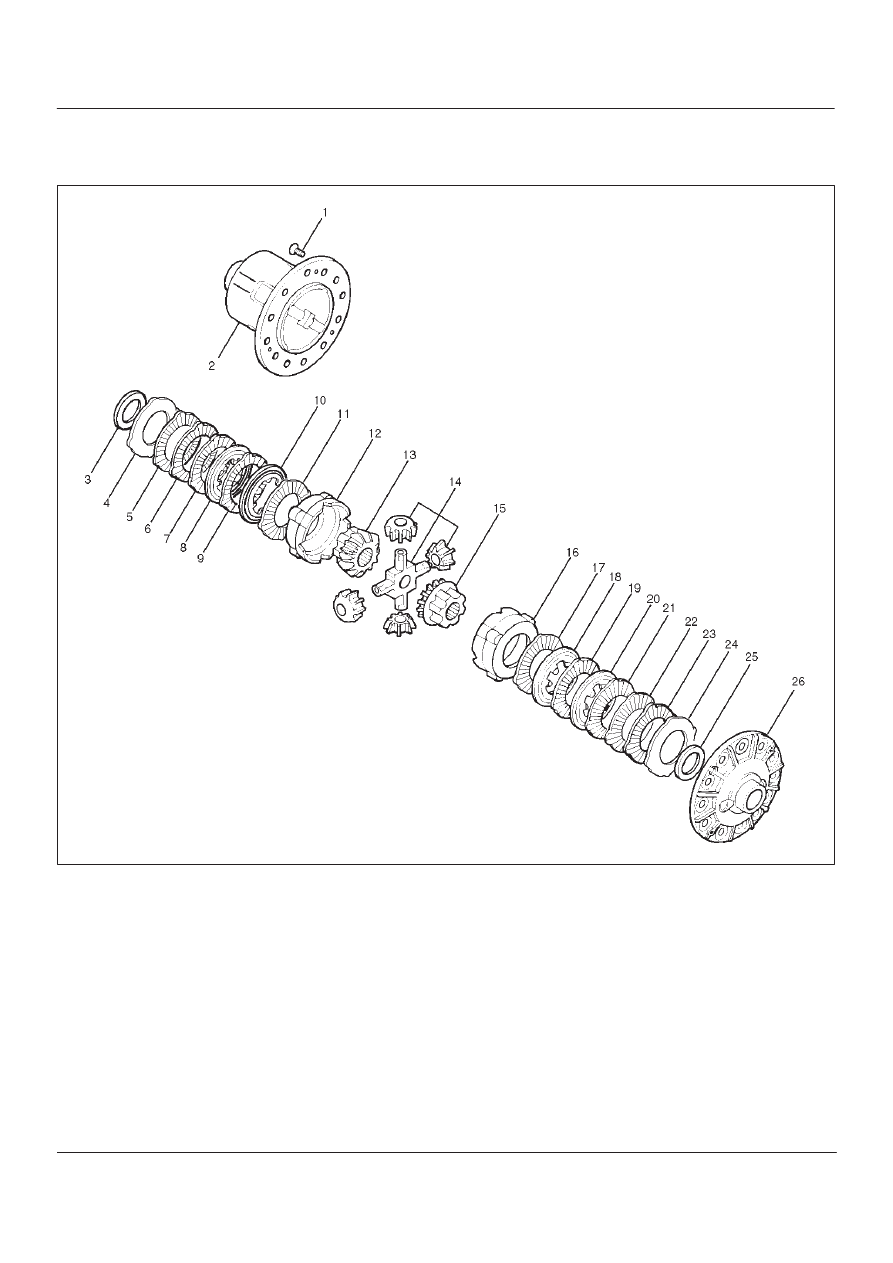
Disassembled View
425RY001
Legend
(1) Screw
(2) Differential cage A
(3) Thrust washer
(4) Spring disc
(5) Friction Plate
(6) Friction plate
(7) Friction Plate
(8) Friction disc
(9) Friction Plate
(10) Friction disc
(11) Friction Plate
(12) Pressure ring
(13) Side gear
(14) Pinion and Pinion shaft
(15) Side gear
(16) Pressure ring
(17) Friction Plate
(18) Friction disc
(19) Friction Plate
(20) Friction disc
(21) Friction Plate
(22) Friction Plate
(23) Friction Plate
(24) Spring disc
(25) Thrust washer
(26) Differential cage B
DIFFERENTIAL (REAR 244mm) 4A2B–29
Disassembly
Differential Cages A and B
1. To ensure installation of the parts in original position
apply a setting mark before removing the differential
cages A and B.
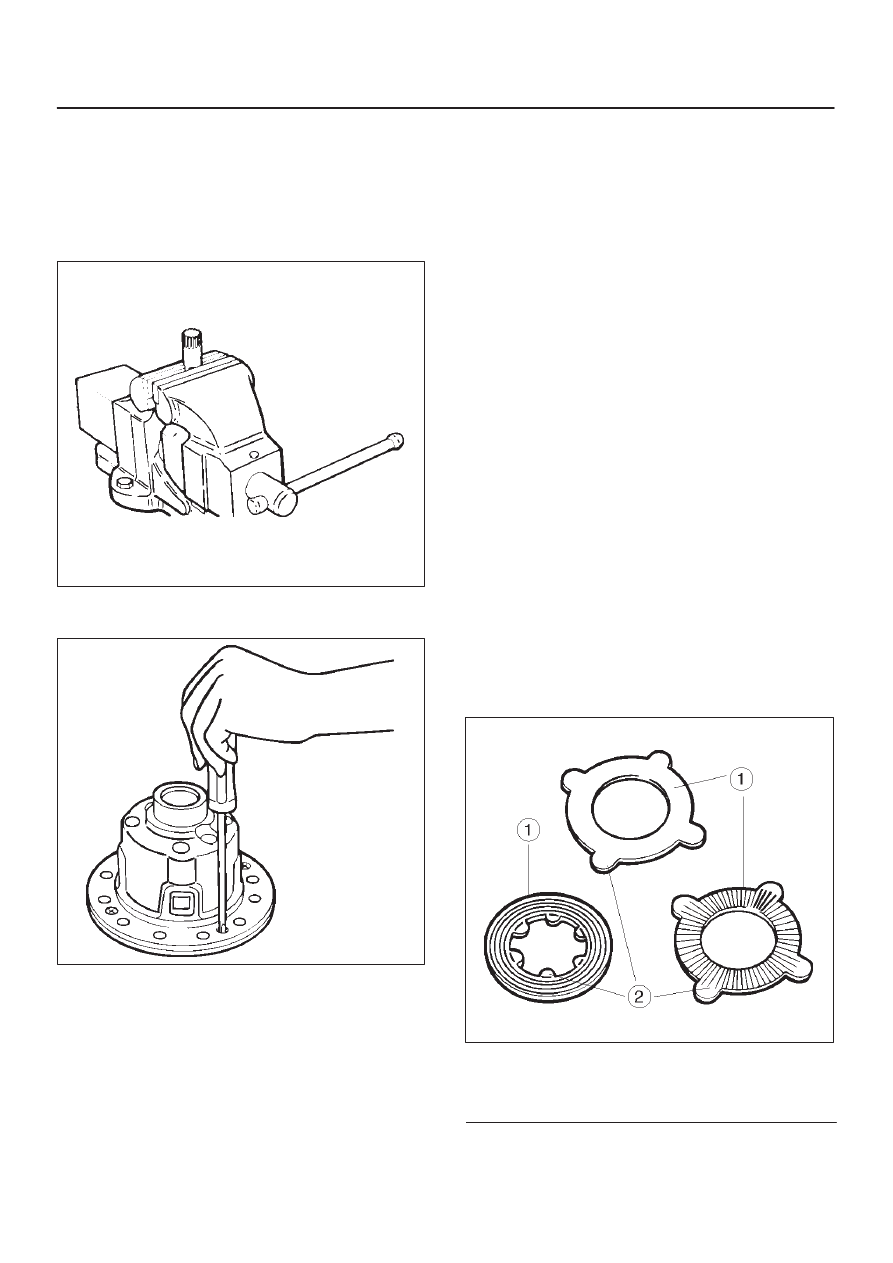
2. Using special tool, 5–8840–2682–0, grip it with a vice,
and set the differential.
425RS054
3. Gradually and evenly loosen the 3 fixing screws of the
differential cages A and B.
425RS055
4. Remove Differential cage A.
5. Remove Thrust washer.
6. Remove Spring disc.
NOTE: When removing the spring disc, friction disc, and
friction plate, place them in order for clear distinction of
left and right use.
7. Remove Spring disc.
8. Remove Friction plate.
9. Remove Friction plate.
10. Remove Friction disc.
11. Remove Friction plate.
12. Remove Friction disc.
13. Remove Friction plate.
14. Remove Pressure ring.
15. Remove Side gear.
16. Remove Pinion and pinion shaft.
17. Remove Side gear.
18. Remove Pressure ring.
19. Remove Friction plate.
20. Remove Friction disc.
21. Remove Friction plate.
22. Remove Friction disc.
23. Remove Friction plate.
24. Remove Friction plate.
25. Remove Friction plate.
26. Remove Friction disc.
27. Remove Thrust washer.
28. Remove Differential cage B.
Inspection and Repair
Make necessary correction or parts replacement if wear,
damage, corrosion or any other abnormal condition is
found through inspection.
Visual check
Check the following parts for wear, damage, noise or any
other abnormal conditions.
D
Friction disc, friction plate and spring disc
425RS056
Legend
(1) Sliding surfaces
(2) Projections
4A2B–30
DIFFERENTIAL (REAR 244mm)
D
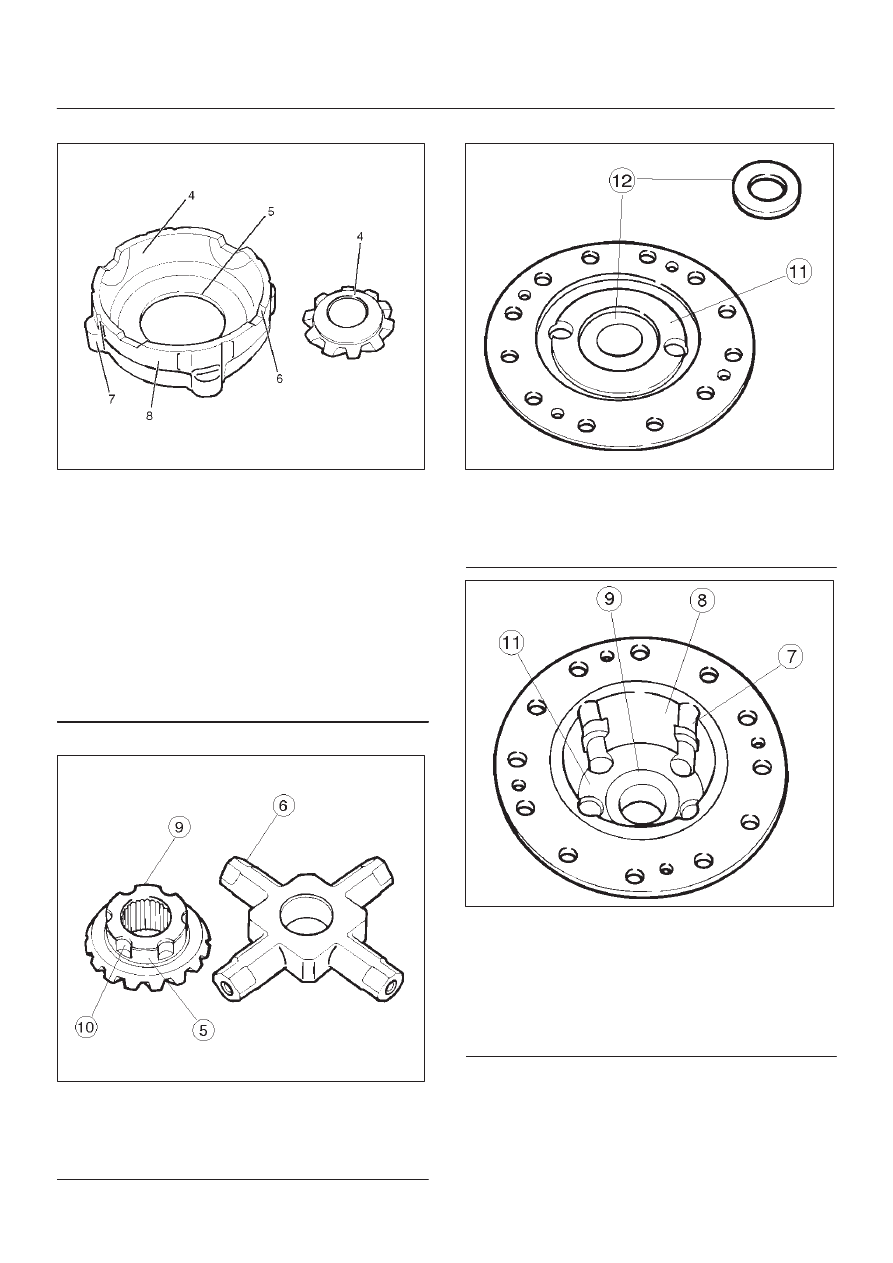
Pressure ring
425RY003
Legend
(3) Sliding surface with the friction disc. When
nicks or scratches are found, polish with an oil
stone and repair on a level block using a
compound.
(4) Sliding spherical surface with the pinion gear.
(5) Sliding surface with the side gear.
(6) V–shaped groove of the pressure ring and V
–shaped section of the pinion shaft.
(7) Fitting section with the case.
(8) Face contacting the inner surface of the
differential case. Repair burrs and nicks using
an oil stone.
D
Thrust washer
425RS058
Legend
(9) Sliding surface with the side gear or case.
(10) Peripheral groove of the side gear.
Repair light nicks and burrs using an oil stone.
D
Case
425RS059
Legend
(11) Contact surface with the spring disc.
(12) Inner groove of the differential cage B.
Repair light nicks and burrs using an oil stone.
425RS060
Legend
(7) Fitting section with the case.
(8) Face contacting the inner surface of the
differential case.
Repair burrs and nicks using an oil stone.
(9) Sliding surface with the side gear or case.
(11) Contact surface with spring disc.
DIFFERENTIAL (REAR 244mm) 4A2B–31
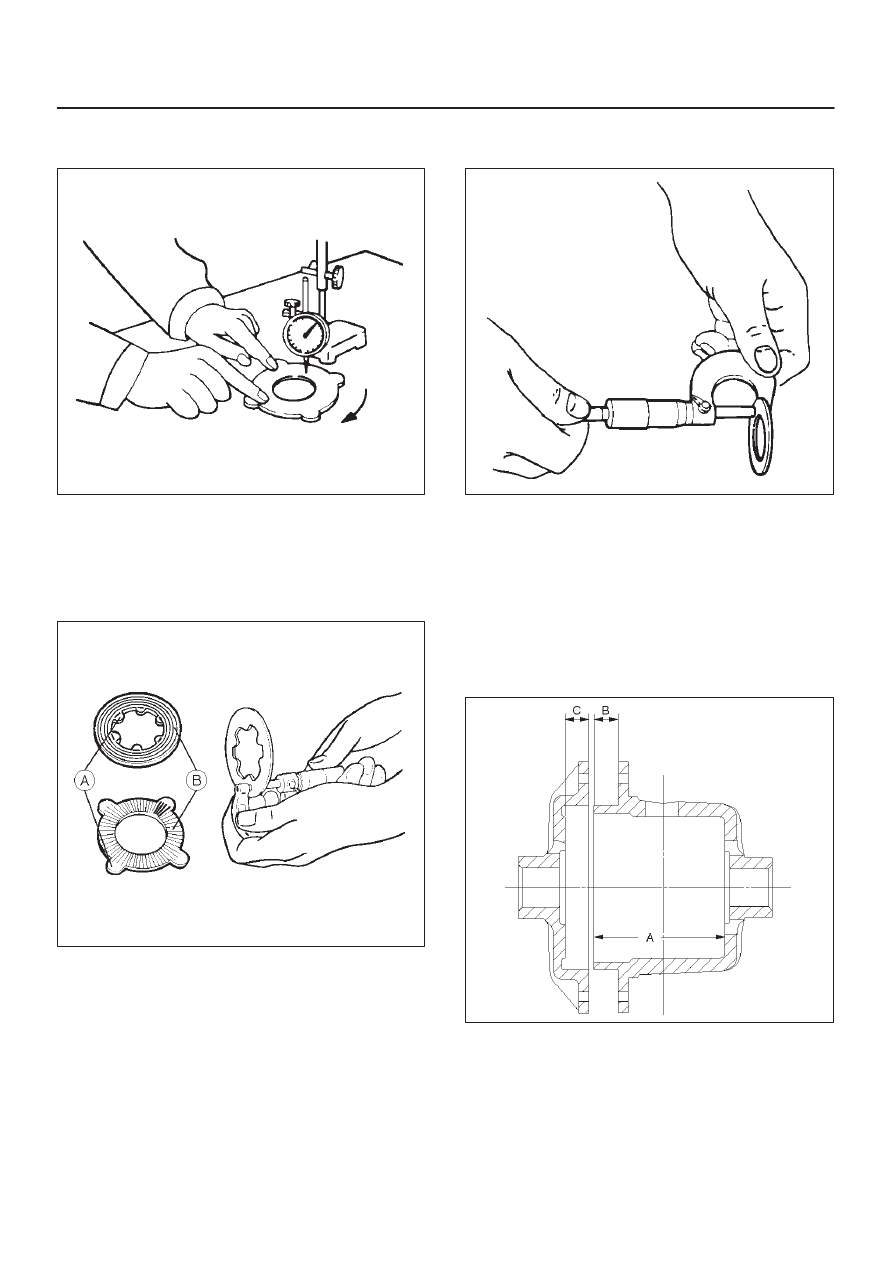
Measure the Deformation of the friction disc & plate.
Limit: 0.1 mm (0.004 in)
425RS061
Measure the wear of the friction plate & disc
Limit(A–B): 0.1 mm (0.004 in)
Remarks:
A=Inner or outer projections
B=Sliding surface subjected to abrasion
425RS062
Measure the wear of the thrust washer
Limit: 1.3 mm (0.05 in)
425RS063
Reassembly
Adjust the clearance between the friction disc and plate.
1. Measuring the depth of the differential cage.
Standard (A–B):
89.13 mm (3.51 in)
(C):
9.13 mm (0.36 in)
425RS064
Нет комментариевНе стесняйтесь поделиться с нами вашим ценным мнением.
Текст