Opel Frontera UBS. Service manual — part 798
8F–20
BODY STRUCTURE
Installation
To install, follow the removal steps in reverse order noting
the following points:
1. Reroute the control cable to its original position, and
check and see if the lock assembly and control lever
work normally.
2. Tighten the hood lock assembly fixing bolts to the
specified torque.
Torque : 10 N
•
m (1.0kg·m/87 lb in)
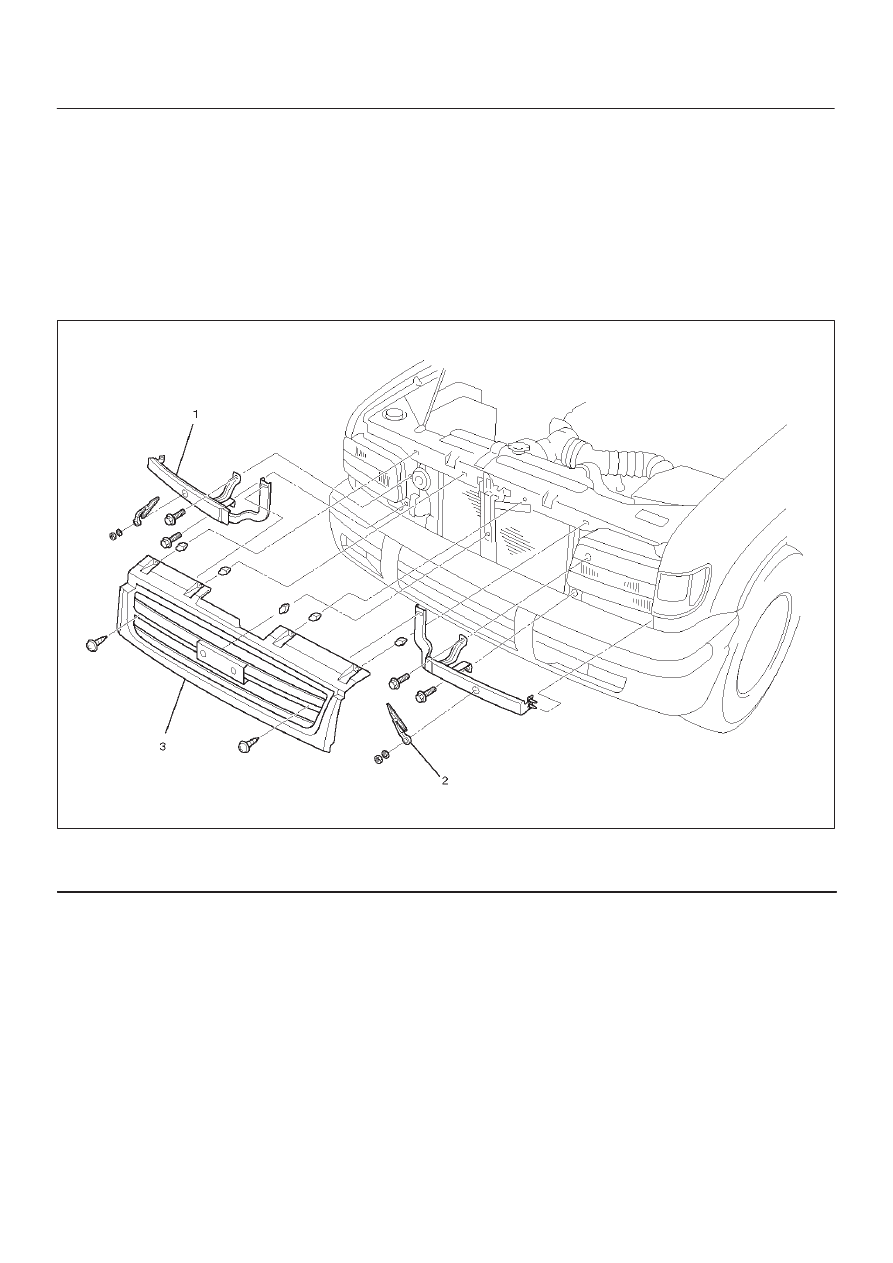
Radiator Grille And Front End Lower Panel
Parts Location
603RW014
Legend
(1) Front End Lower Panel
(2) Head light Wiper
(3) Radiator Grille
Removal
1. Open the hood.
2. Support the hood.
3. Remove headlight wiper.
D
Refer to Wiper/Washer System in this section.
8F–21
BODY STRUCTURE
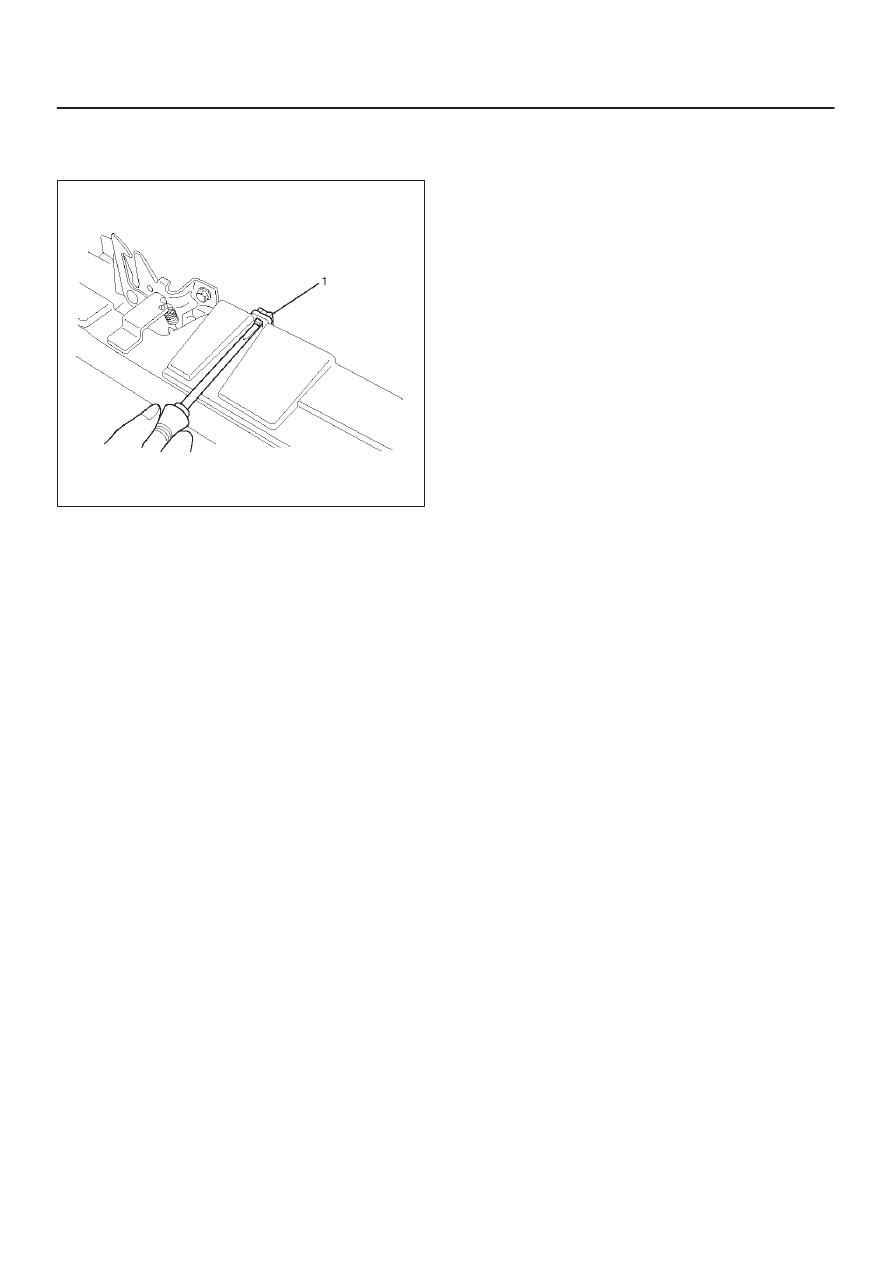
4. Remove radiator grille.
D
Raise the clips (1) on the radiator grille and remove
two screws.
603RW012
5. Remove front end lower panel.
D
Remove two fixing bolts and remove the panel from
the fender.
Installation
To install, follow the removal steps in reverse order, noting
the following point.
1. Install the radiator grille clips remaining on the body
side in the radiator grille, and then install the radiator
grille on the body.
8F–22
BODY STRUCTURE
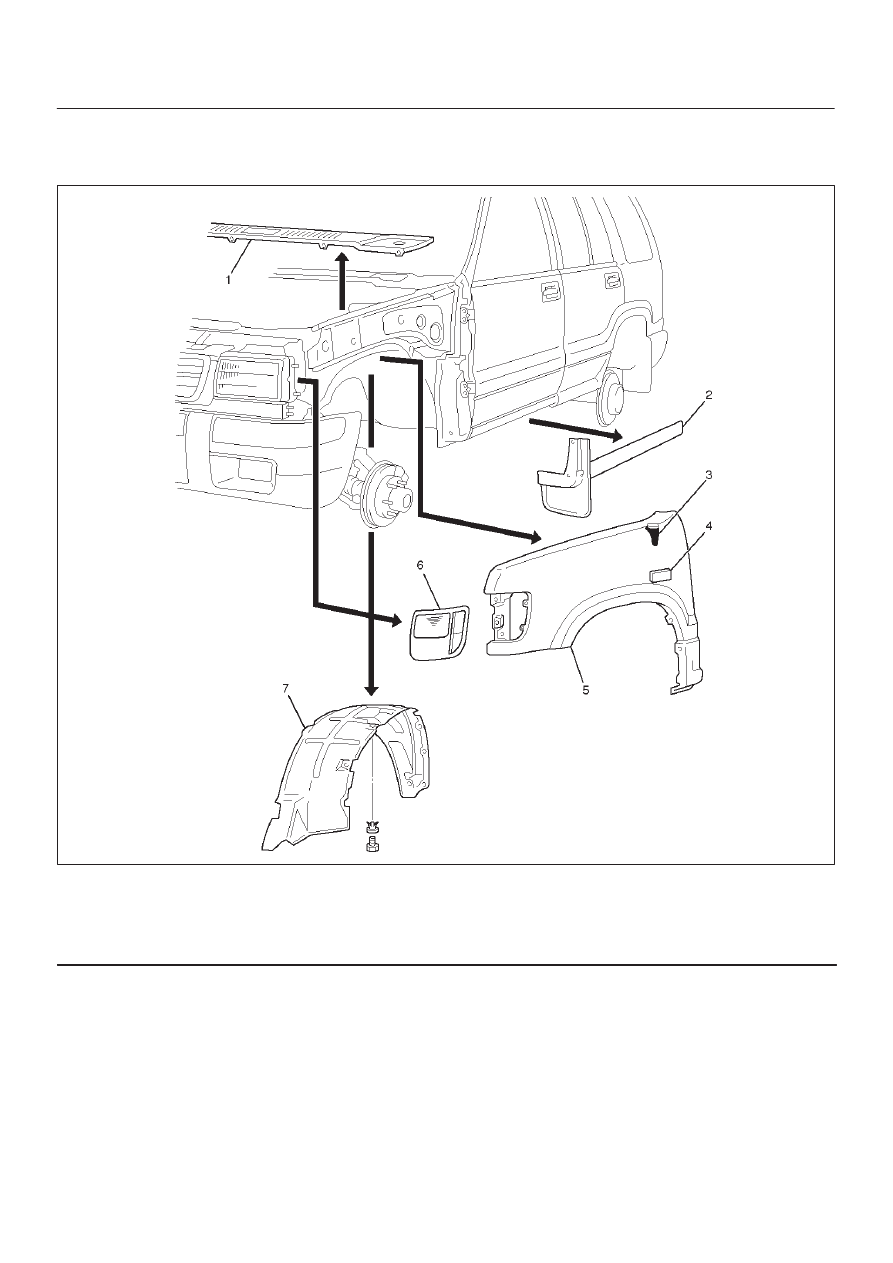
Front Fender Panel
Parts Location
605RW008
Legend
(1) Cowl Cover
(2) Front Mud Flap
(3) Antenna Bezel
(4) Side Flasher Light
(5) Front Fender Panel
(6) Front Combination Lamp Assembly
(7) Inner Liner
Removal
1. Open the hood.
2. Support the hood.
3. Disconnect the battery ground cable.
4. Remove cowl cover.
D
Refer to Cowl Cover in this section.
5. Remove front combination lamp assembly.
D
Disconnect fixing screw and connector.
6. Remove front mud flap.
D
Disconnect three fixing screws and four clips.
7. Remove inner liner.
8. Remove antenna bezel.
D
Refer to Entertainment in this section.
9. Remove side flasher light.
D
Refer to Lighting System in this section.
8F–23
BODY STRUCTURE
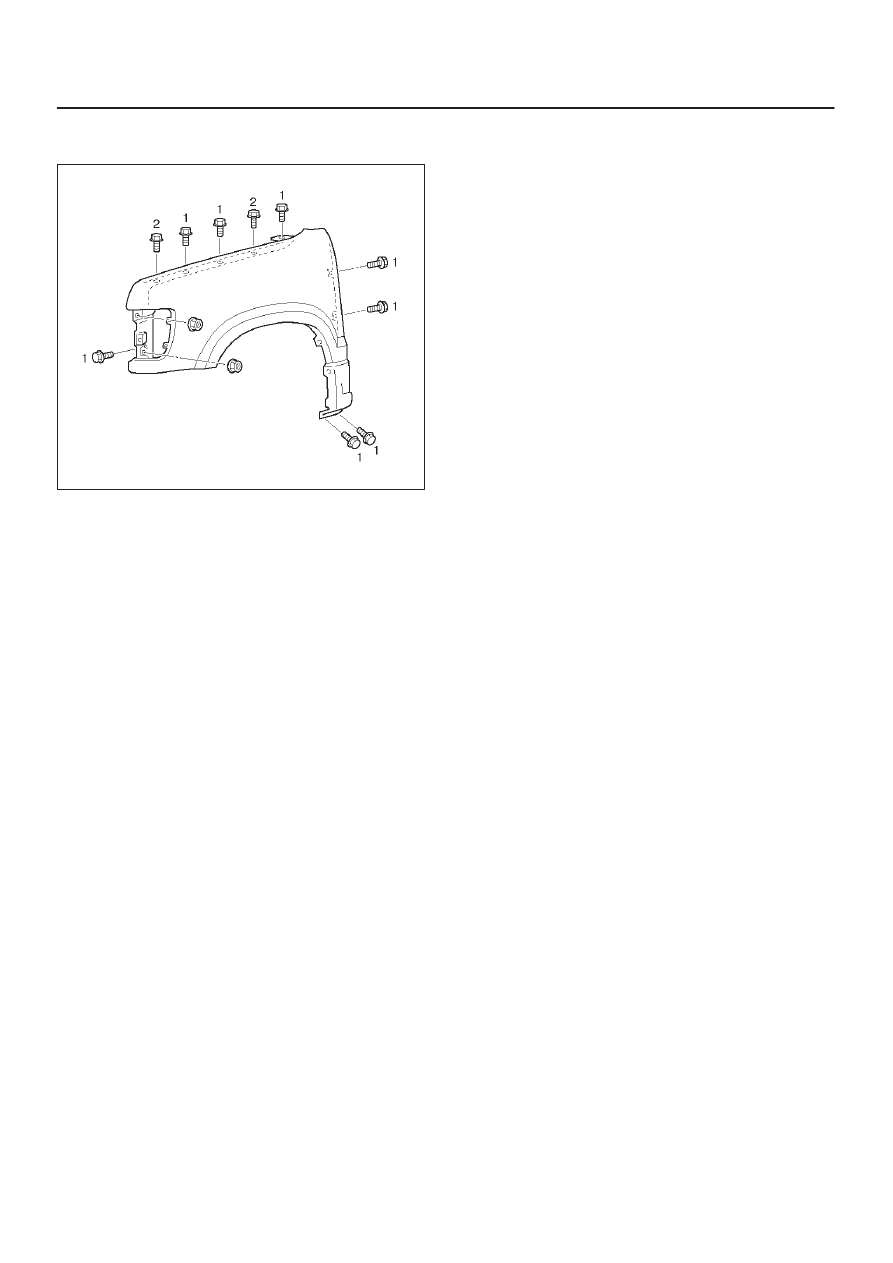
10. Remove front fender panel.
D
Disconnect ten fixing bolts and two nuts.
605RW001
Installation
To install, follow the removal steps in the reverse order
noting the following points:
1. Tighten the front fender panel fixing bolts to the
specified torque.
(1) Torque : 9 N
•
m (0.9kg·m/78 lb in)
(2) Torque : 7 N
•
m (0.7kg·m/61 lb in)
Нет комментариевНе стесняйтесь поделиться с нами вашим ценным мнением.
Текст