Opel Frontera UBS. Service manual — part 989
4A2A–10 DIFFERENTIAL (REAR 220mm)
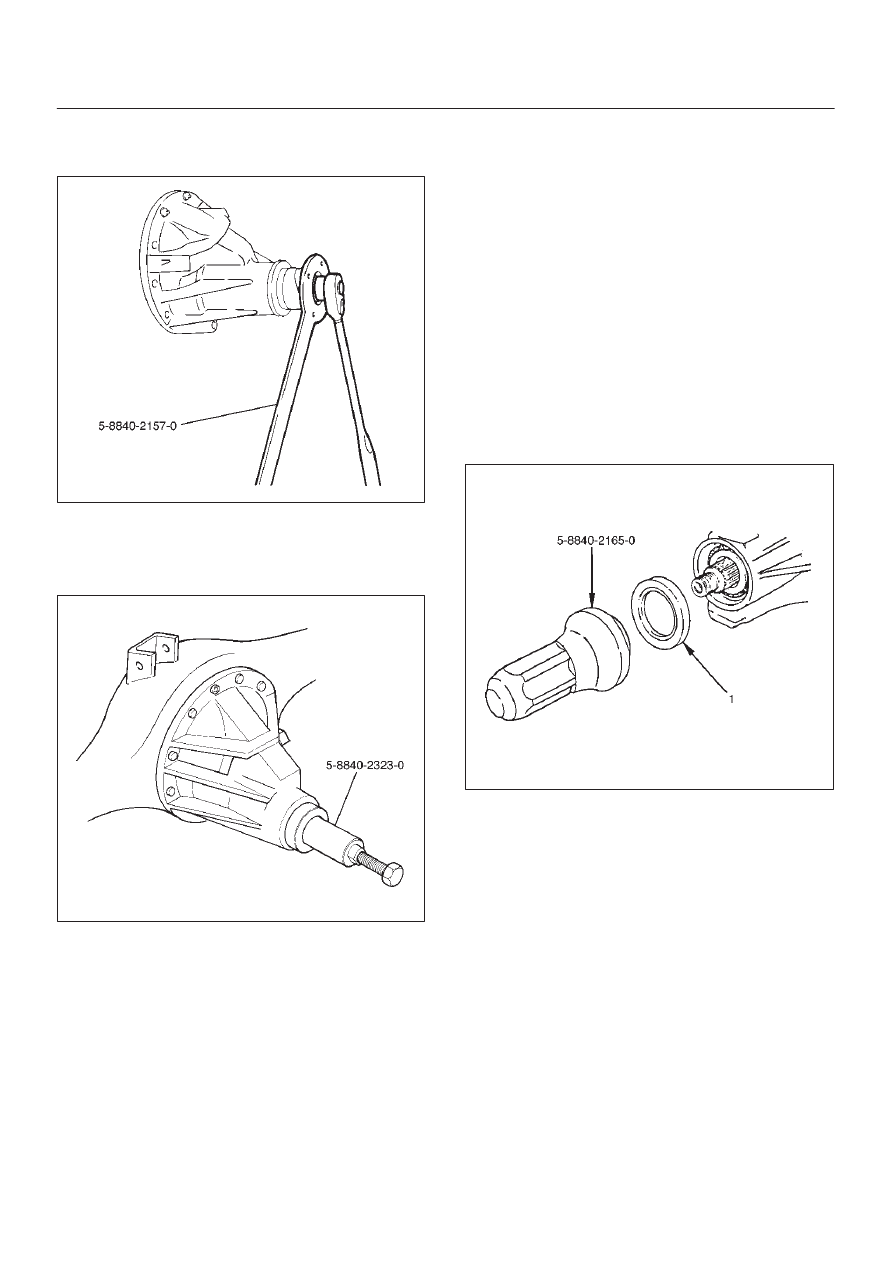
3. Remove flange nut and washer by using pinion flange
holder 5–8840–2157–0 after raising up its staked
parts completely.
415RW028
4. Remove flange.
5. Remove oil seal.
6. Remove outer bearing by using remover
5–8840–2323–0.
425RW066
7. Remove collapsible spacer.
Inspection and Repair
Make necessary correction or parts replacement if wear,
damage, corrosion or any other abnormal conditions are
found through inspection.
Check the following parts:
1. Seal surface of the pinion.
2. Cage bore for burns.
Installation
1. Install collapsible spacer, discard the used collapsible
spacer and install a new one.
2. Install outer bearing.
NOTE: Do not drive in, but just temporarily set in the outer
bearing by hand, which should be indirectly pressed in
finally by tightening the flange nut.
3. By using the seal installer 5–8840–2165–0, install a
new oil seal (1) that has grease on seal lip.
425RW050
4. Install flange.
5. Install flange nut and washer. Refer to Differential
Assembly in this section for flange nut reassembly.
NOTE: Discard the used nut and install a new one.
DIFFERENTIAL (REAR 220mm) 4A2A–11
Differential Assembly
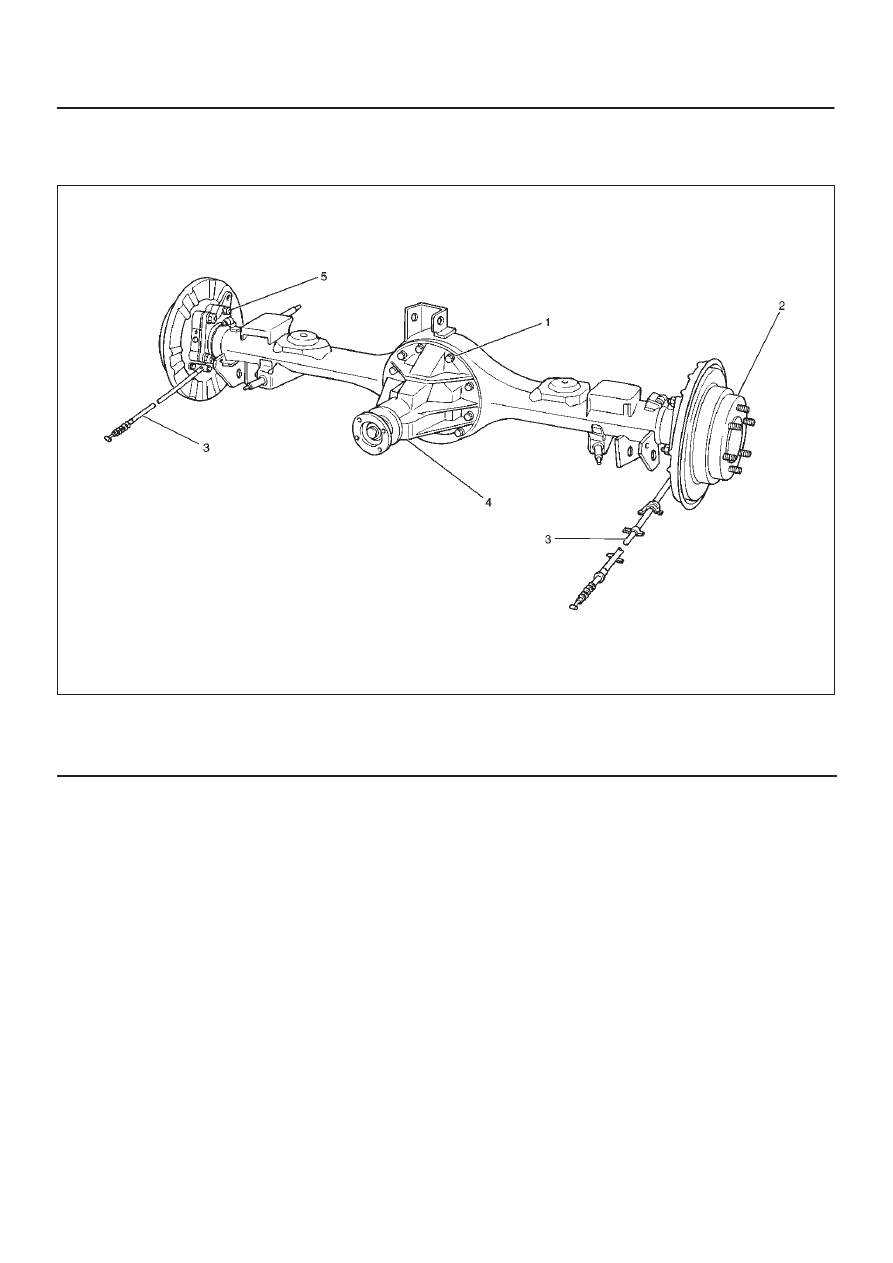
Differential Assembly and Associated Parts
425RW055
Legend
(1) Bolt and Nut
(2) Axle Shaft Assembly
(3) Parking Brake Cable
(4) Differential Assembly
(5) Nut
Removal
1. Jack up and support the frame with stands.
2. Remove the wheel and tire. Refer to Wheel in
Steering section.
3. Drain the differential oil.
4. Remove the propeller shaft. Refer to Rear Propeller
Shaft in this section.
5. Remove the ABS speed sensor(ABS model only).
Refer to 4–Wheel Anti–lock Brake System (ABS) in
Brake section.
6. Remove the parking brake cable fastening clip and
disconnect the equalizer section. Refer to Parking
Brakes in Brake section.
7. Remove the bearing holder fixing nuts.
8. Remove axle shaft assembly, be sure not to damage
the oil seal by axle shaft.
9. Remove differential carrier mounting bolts and nuts.
10. Remove differential assembly.
4A2A–12 DIFFERENTIAL (REAR 220mm)
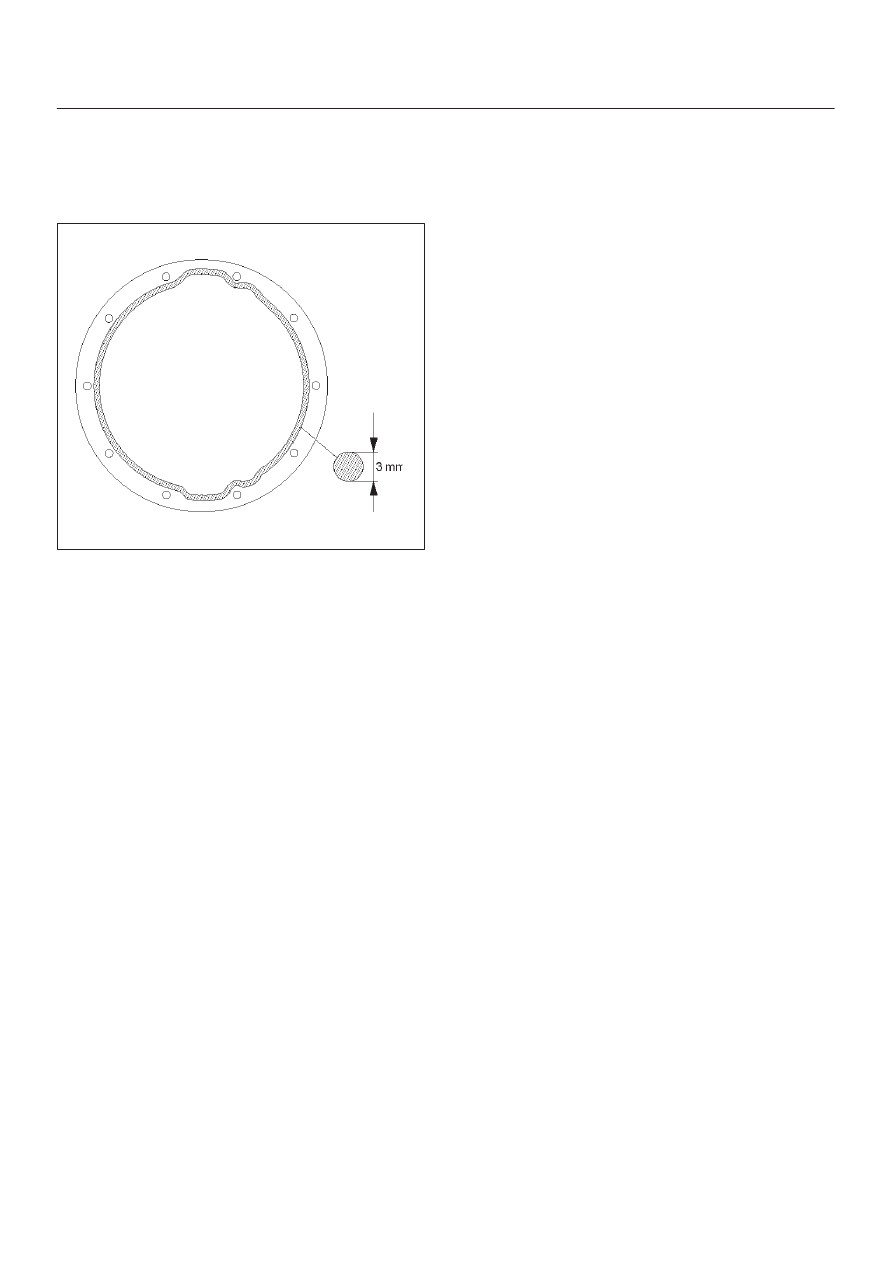
Installation
1. Clean the contact surfaces of the axle and differential
carrier. As shown in the drawing, apply Three Bond
TB1215 or equivalent then install differential
assembly.
425RS006
2. Install bolt and nut. Tighten the differential carrier
mounting bolts and nuts to the specified torque.
Torque:Nuts 44N·m (4.5kg·m/33lb ft)
Bolts 64N·m (6.5kg·m/47lb ft)
3. Install axle shaft assembly. Be sure not to damage
the oil seal by axle shaft.
4. Install nut, refer to Axle Shaft in this section.
5. Install parking brake cable, refer to Parking Brakes in
Brake section.
NOTE: After completing the assembling work, fill the
prescribed gear oil to the filler hole.
Lubricant capacity: 1.8 liter (1.6 Imp qt/1.9US
qt)
6. Tighten the oil filler plug to the specified torque.
Torque: 78N·m (8.0kg·m/58lb ft)
DIFFERENTIAL (REAR 220mm) 4A2A–13
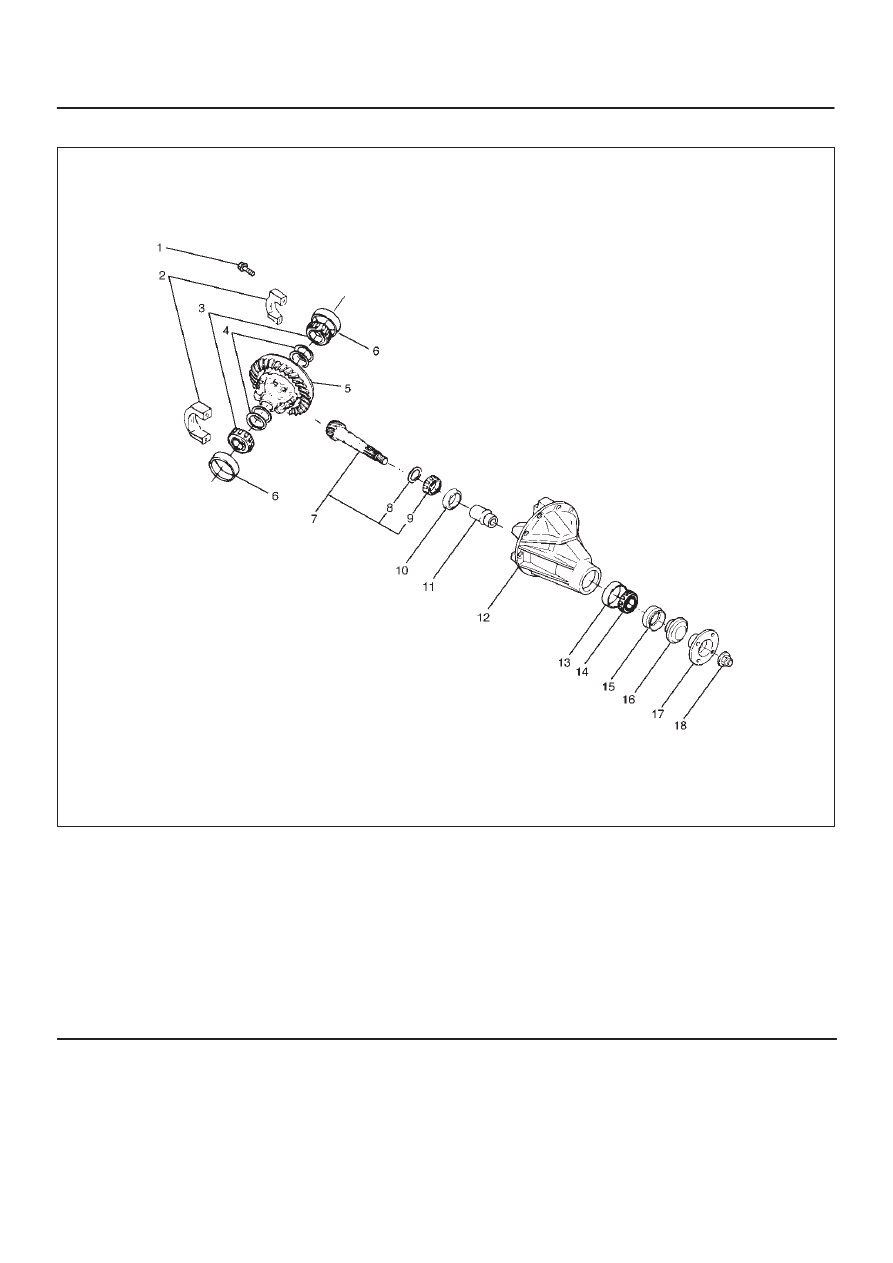
Disassembled View
415RW035
Legend
(1) Bolt
(2) Bearing Cap
(3) Side Bearing
(4) Adjust Shim
(5) Diff Cage Assembly
(6) Side Bearing Outer Race
(7) Pinion Gear
(8) Adjust Shim
(9) Inner Bearing
(10) Inner Bearing Outer Race
(11) Collapsible Spacer
(12) Differential Carrier
(13) Outer Bearing Outer Race
(14) Outer Bearing
(15) Oil Seal
(16) Dust Cover
(17) Flange
(18) Flange Nut
Нет комментариевНе стесняйтесь поделиться с нами вашим ценным мнением.
Текст