Opel Frontera UBS. Service manual — part 2647
7B–64 MANUAL TRANSMISSION
6. Check that the top gear shaft and mainshaft
rotate.
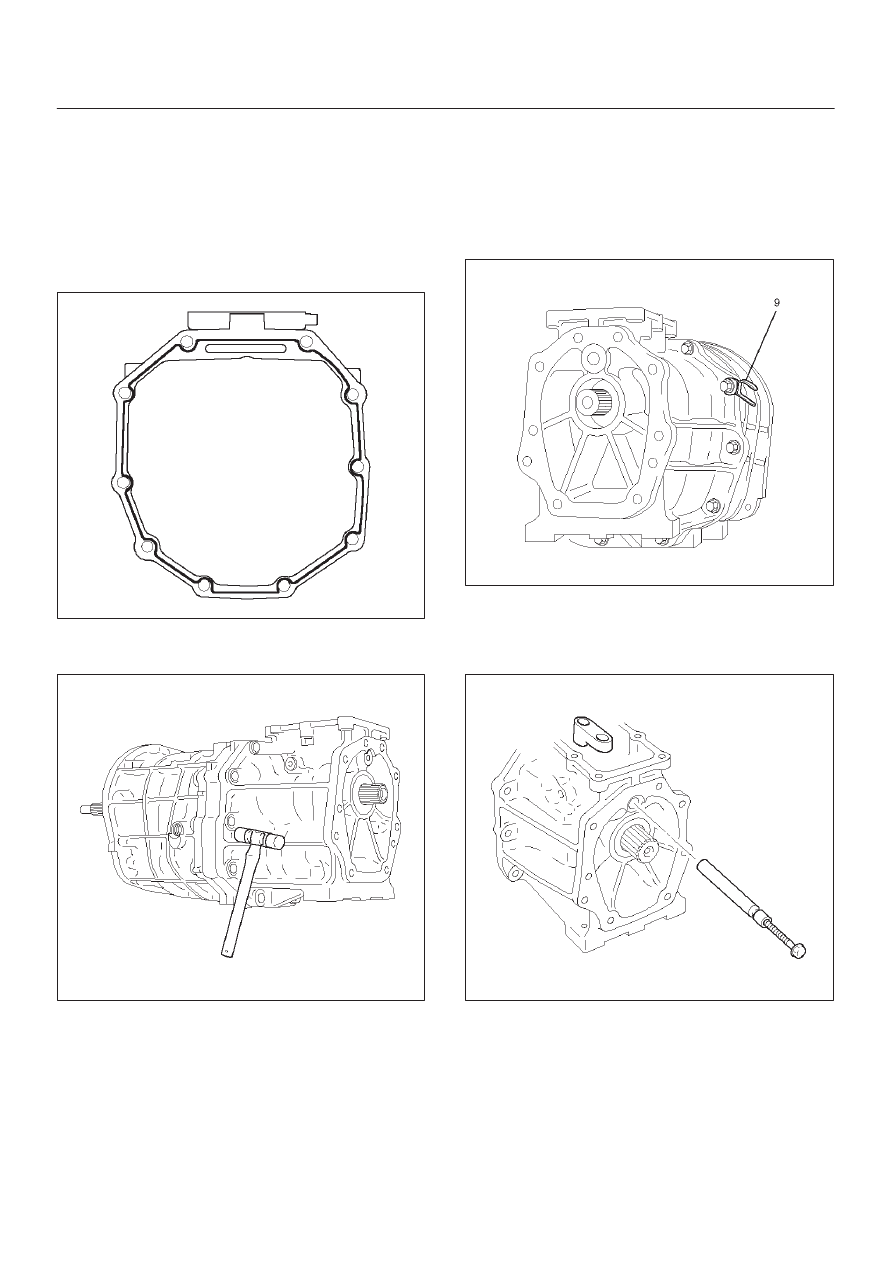
36. Install the transfer adapter.
1. Clean up the fitting surface.
2. Apply recommended liquid gasket (THREE
BOND 1281 or equivalent), as shown.
NOTE:
D
Don’t dry the liquid gasket.
220RW026
3. Using a plastic hammer, tap the transfer adapter
and attach it to the intermediate plate.
220RW034
4. Using 10 bolts, install the transfer adapter.
Torque: 37 N·m (3.8 kg·m/27 lb ft)
NOTE:
D
Tighten the all bolts evenly.
D
Don’t damage the lip of the oil seal.
D
Install the wire clamp (9) to the transfer adapter.
220RW083
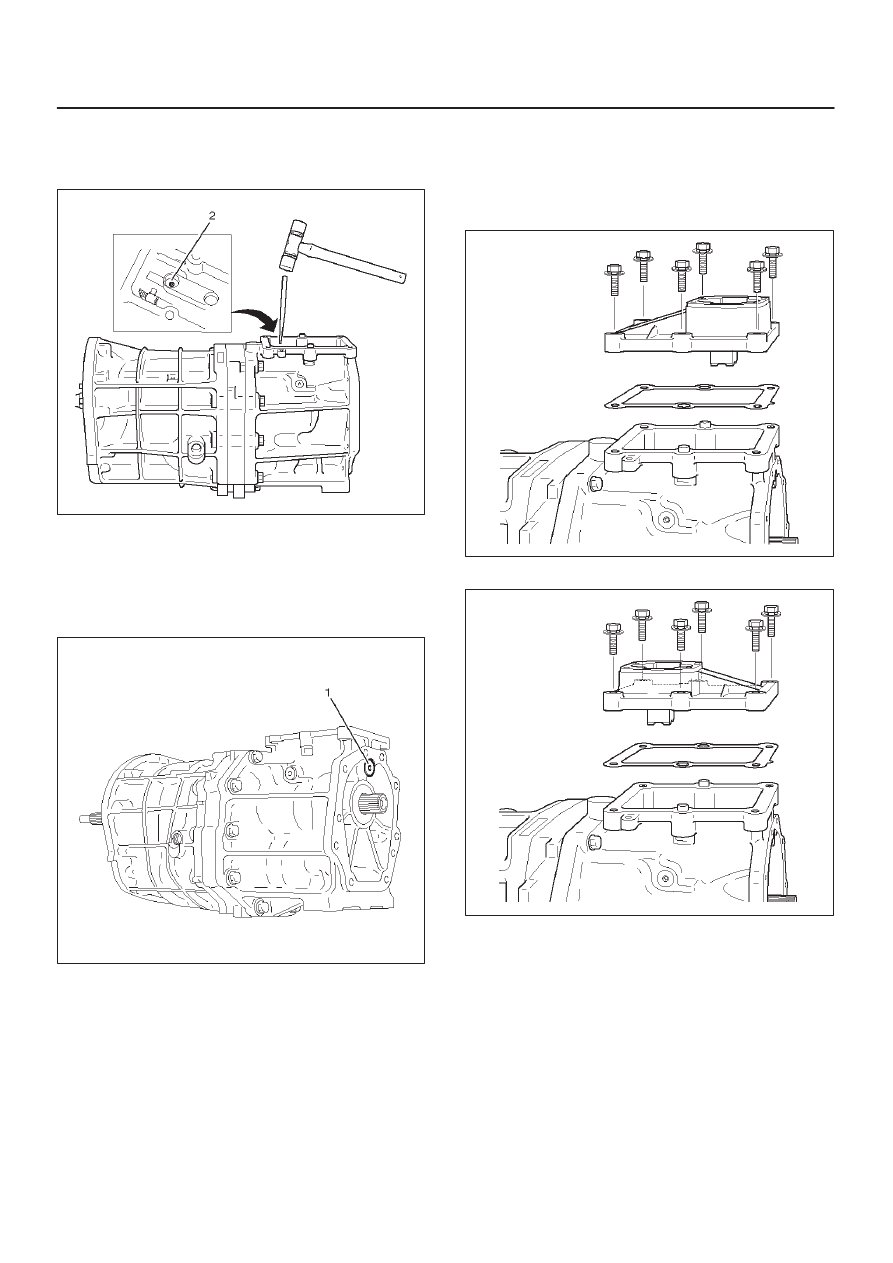
37. Install the gear control box.
1. Align the projection of the shift lever housing to
the shaft rod groove, and install the gear control
rod.
230RW003
MANUAL TRANSMISSION
7B–65
2. Using a pin punch and hammer, drive in the
slotted spring pin (2) to the shift lever housing.
NOTE: Be carefull not to drop the slotted spring pin.
230RW002
3. Apply sealant (THREE BOND 1344 or
equivalent) to the plug (1) thread.
4. Using hexagon wrench, install and torque the
plug (1).
Torque: 18 N·m (1.8 kg·m/13 lb ft)
220RW010
5. Clean up the bolts and bolt hole.
6. Using 6 bolts, install the gear control box through
the gasket.
Torque 18 N·m (1.8 kg·m/13 lb ft)
(6VE1)
230RW001
(4JX1)
220RW097
7B–66 MANUAL TRANSMISSION
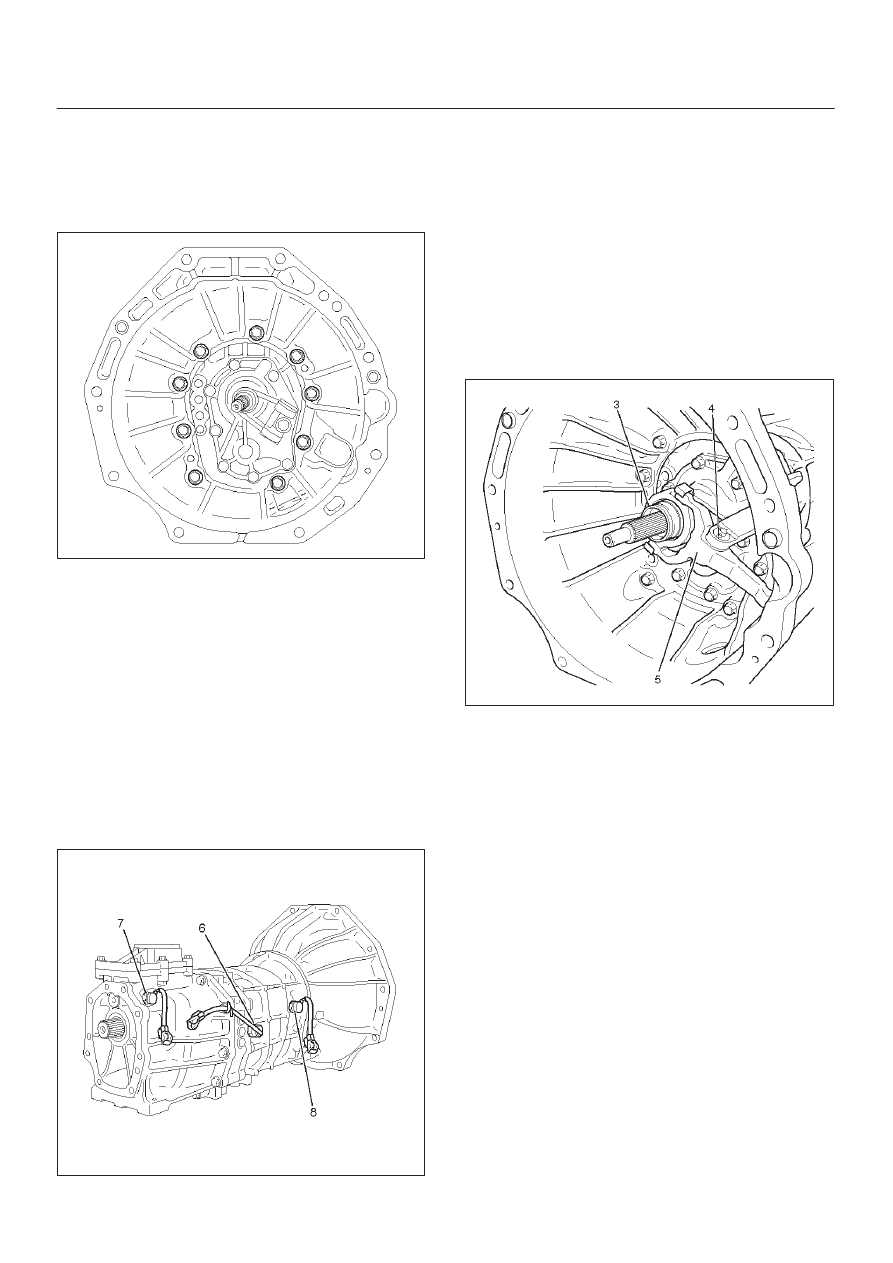
38. Install clutch housing.
1. Install the clutch housing to the transmission
case.
Torque: 36 N·m (3.7 kg·m/27 lb ft)
NOTE: Tighten the all bolts evenly.
241RW001
39. Install the switches.
1. Install the new gasket to the 1st and 2nd switch.
2. Install the 1st and 2nd switch assembly (8).
Torque: 39 N·m (4.0 kg·m/29 lb ft)
3. Install the new gasket to the backup light switch.
4. Install the backup light switch assembly (6).
Torque: 44 N·m (4.5 kg·m/33 lb ft)
5. Install the new gasket to the neutral switch.
6. Install the neutral switch (7) to the transfer
adapter (4JX1).
Torque: 37 N·m (3.8 kg·m/27 lb ft)
(4JX1)
220RW093
40. Install the clutch release bearing (3) and clutch shift
fork (5).
1. Apply the clutch release grease.
1. Fitting surface of the cylinder push rod.
2. Fitting surface of the release bearing hub.
3. The hole of the fork split pin (4).
2. Apply the clutch release grease.
1. The spline surface of the top gear shaft.
3. Install the clutch shift fork (5).
4. Install the snap pin.
5. Install the clutch release bearing (3) to the clutch
shift fork (5).
220RW086
MANUAL TRANSMISSION
7B–67
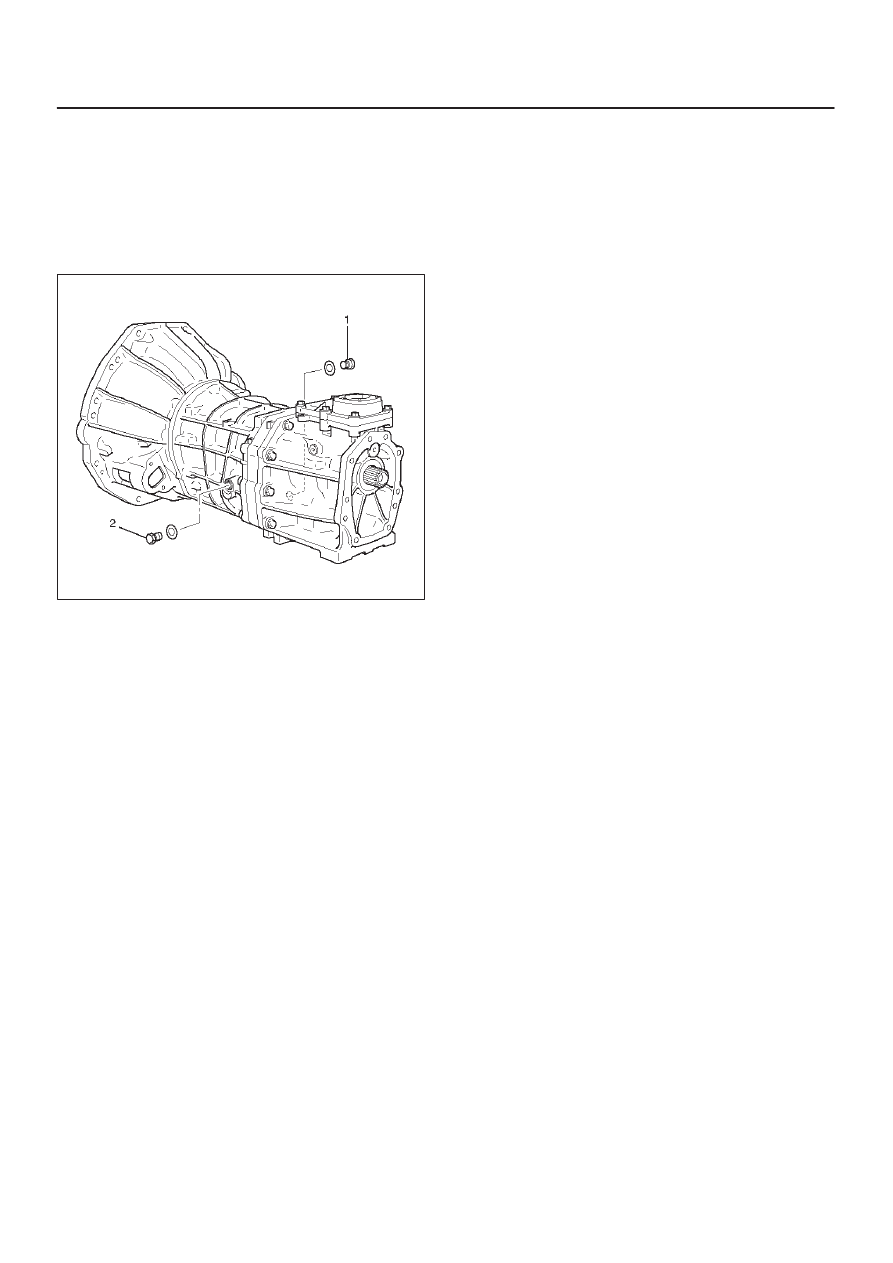
41. Install the drain plug and filler plug.
1. Install the drain plug (1) through the new gasket.
Torque: 37 N·m (3.8 kg·m/27 lb ft)
2. Install the filler plug (2) through the new gasket.
Reference: Plug after the gear oil fill in.
Torque: 37 N·m (3.8 kg·m/27 lb ft)
(6VE1)
220RW007
Нет комментариевНе стесняйтесь поделиться с нами вашим ценным мнением.
Текст