Jeep Commander (2010 year). Manual — part 7

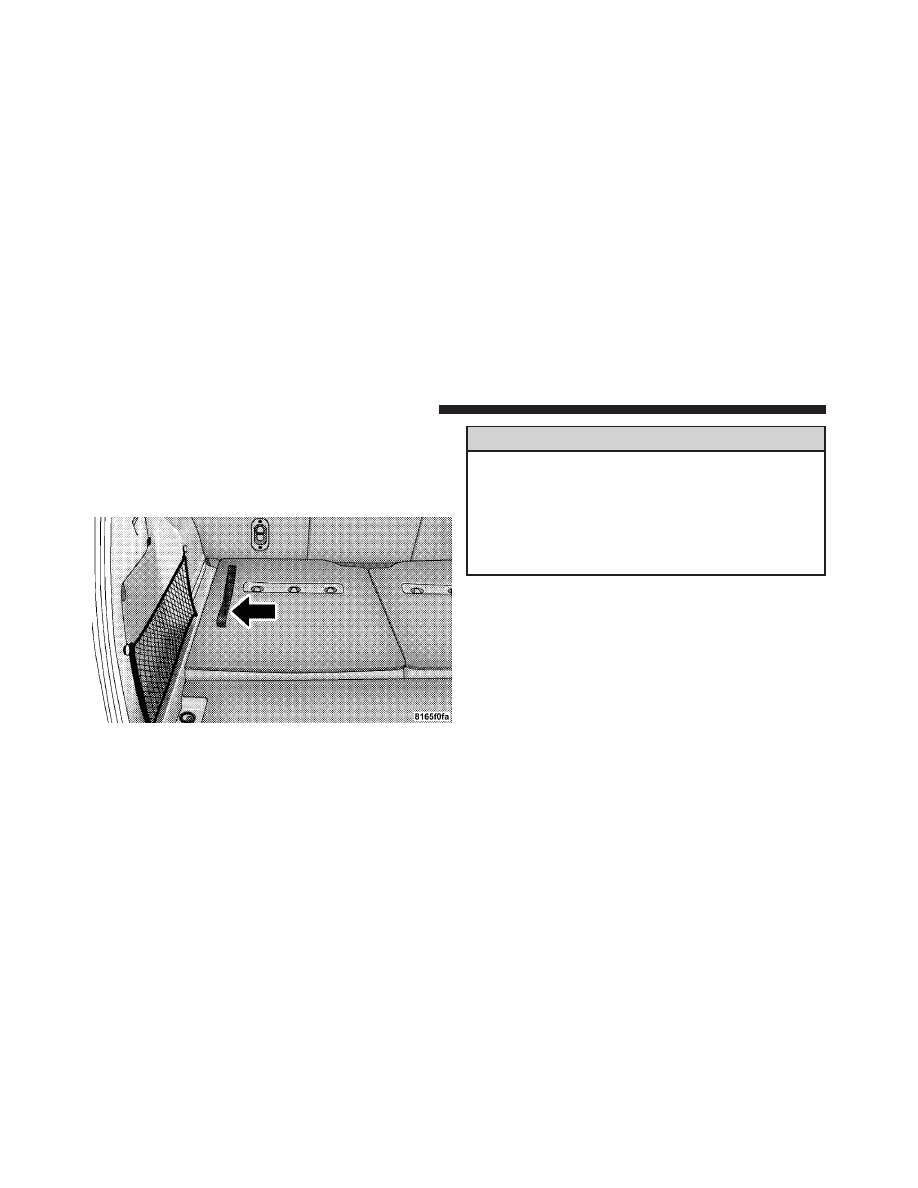
50/50 Third Row Folding Seat — If Equipped
To Lower Rear Seat
Either side of the third row seat can be lowered to allow
for extended cargo space and still maintain some rear
seating room.
1. Open the tailgate.
2. Pull the seatback release handle (toward rear of ve-
hicle) and lower the seatback using the pull strap.
3. Close the tailgate.
Seatback Release Handle
3
UNDERSTANDING THE FEATURES OF YOUR VEHICLE
97
To Raise Rear Seat
1. Open the tailgate.
2. Detach pull strap from back of seat and pull seatback
upward until it locks into place. Reattach strap.
3. Close the tailgate.
WARNING!
The cargo area in the rear of the vehicle (with the rear
seatbacks in the locked-up or folded down position)
should not be used as a play area by children when
the vehicle is in motion. They could be seriously
injured in an accident. Children should be seated
and using the proper restraint system.
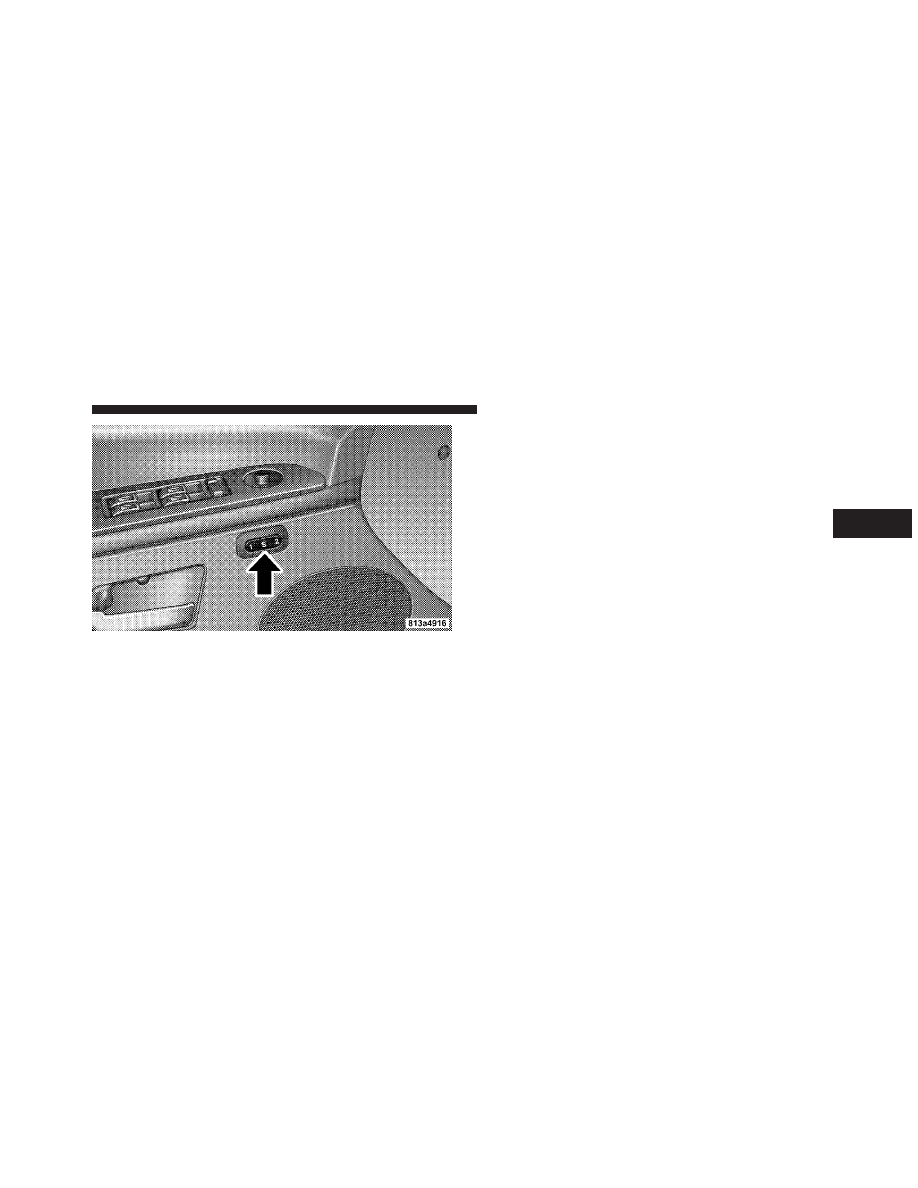
DRIVER MEMORY SEAT — IF EQUIPPED
Once programmed, the memory buttons 1 and 2 on the
driver’s door panel can be used to recall the driver’s seat,
driver’s outside mirror, adjustable brake and accelerator
pedals and radio station preset settings. Your Remote
Keyless Entry (RKE) transmitters can also be pro-
grammed to recall the same positions when the UN-
LOCK button is pressed.
Pull Strap
98
UNDERSTANDING THE FEATURES OF YOUR VEHICLE
Your vehicle is equipped with two RKE transmitters. One
or both RKE transmitters can be linked to either memory
position. The memory system can accommodate up to
four RKE transmitters, each one linked to either of the
two memory positions.
Setting Memory Positions and Linking Remote
Keyless Entry Transmitter to Memory
NOTE:
Each time the S (SET) button and a numbered
button 1 or 2 are pressed, you erase the memory settings
for that button and store a new one.
1. Insert the ignition key, and turn the ignition switch to
the ON position.
2. Press the driver door MEMORY button number 1 if
you are setting the memory for driver 1, or button
number 2 if you are setting the memory for driver 2. The
system will recall any stored settings. Wait for the system
to complete the memory recall before continuing to
Step 3.
3. Adjust the driver’s seat, recliner, and driver’s sideview
mirror to the desired positions.
4. Adjust the brake and accelerator pedals to the desired
positions.
Driver Memory Switches
3
UNDERSTANDING THE FEATURES OF YOUR VEHICLE
99
5. Turn on the radio and set the radio station presets (up
to 12 AM and 12 FM stations can be set).
6. Turn the ignition switch to the LOCK position and
remove the key.
7. Press and release the S (SET) button located on the
driver’s door.
8. Within five seconds, press and release MEMORY
button 1 or 2 on the driver’s door. The next step must be
performed within five seconds if you desire to also use a
RKE transmitter to recall memory positions.
9. Press and release the LOCK button on one of the RKE
transmitters.
10. Insert the ignition key, and turn the ignition switch to
the ON position.
11. Select
⬙Remote Linked to Memory⬙ in the Electronic
Vehicle Information Center (EVIC) and enter
⬙Yes⬙. Refer
to “Electronic Vehicle Information Center (EVIC) —
Customer-Programmable Features” in Section 4 for more
information.
12. Repeat the above steps to set the next memory
position, using the other numbered memory button, or to
link another RKE transmitter to memory.
Memory Position Recall
NOTE:
The vehicle must be in PARK to recall memory
positions. If a recall is attempted when the vehicle is not
in PARK, a message will be displayed in the Electronic
Vehicle Information Center (EVIC).
To recall the memory settings for driver one, press
MEMORY button number 1 on the driver’s door, or the
UNLOCK button on the RKE transmitter linked to
memory position 1.
100
UNDERSTANDING THE FEATURES OF YOUR VEHICLE
To recall the memory setting for driver two, press
MEMORY button number 2 on the driver’s door, or the
UNLOCK button on the RKE transmitter linked to
memory position 2.
A recall can be cancelled by pressing any of the
MEMORY buttons on the drivers door during a recall (S,
1, or 2). When a recall is cancelled, the driver’s seat,
driver’s mirror and the pedals stop moving. A delay of
one second will occur before another recall can be
selected.
To Disable a RKE Transmitter Linked to Memory
1. Turn the ignition switch to the LOCK position, and
remove the key.
2. Press and release MEMORY button number 1. The
system will recall any memory settings stored in position
1. Wait for the system to complete the memory recall
before continuing to Step 3.
3. Press and release the memory S (SET) button located
on the driver’s door.
4. Within five seconds, press and release MEMORY
button 1 on the driver’s door.
5. Within five seconds, press and release the UNLOCK
button on the RKE transmitter.
To disable another RKE transmitter linked to either
memory position, repeat steps 1 through 5 for each RKE
transmitter.
NOTE:
Once programmed, all RKE transmitters linked
to memory can be easily enabled or disabled at one time.
Refer to Remote Linked to Memory under
⬙Electronic
Vehicle Information Center (EVIC) — Customer-
Programmable
Features
⬙ in Section 4 for more
information.
3
UNDERSTANDING THE FEATURES OF YOUR VEHICLE
101
Easy Entry/Exit Seat
This feature provides automatic driver’s seat positioning
which will enhance driver mobility out of and into the
vehicle.
There are two possible Easy Entry/Exit adjustments
available:
• The seat cushion will move rearward approximately
2.5 in (60 mm), if the starting position of the seat is
greater than or equal to 2.67 in (68 mm) forward of the
rear seat stop when the key is removed from the
ignition switch. The seat will then move forward
approximately 2.5 in (60 mm) when the key is placed
into the ignition and turned out of the LOCK position.
• The seat will move to the position located 0.3 in
(8 mm) forward of the rear stop if the starting position
is between 0.9 to 2.67 in (23 to 68 mm) forward of the
rear stop when the key is removed from the ignition
switch. The seat will move forward to the memory/
driving position when the key is placed into the
ignition, and turned out of the LOCK position toward
the ACC/ON position.
The Easy Entry/Exit feature will be automatically dis-
abled if the seat is already positioned closer than 0.9 in
(23 mm) forward of the rear stop. At this position, there
is no benefit to the driver by moving the seat for Easy
Exit/Entry.
Each stored memory setting will have an associated Easy
Entry/Exit position.
NOTE:
The Easy Entry/Exit feature is not enabled
when the vehicle is delivered from the factory. The Easy
Entry/Exit feature is enabled (or later disabled) through
the programmable features in the Electronic Vehicle
Information Center (EVIC). Refer to
⬙Electronic Vehicle
Information Center (EVIC) — Customer-Programmable
Features
⬙ in Section 4 for more information.
102
UNDERSTANDING THE FEATURES OF YOUR VEHICLE
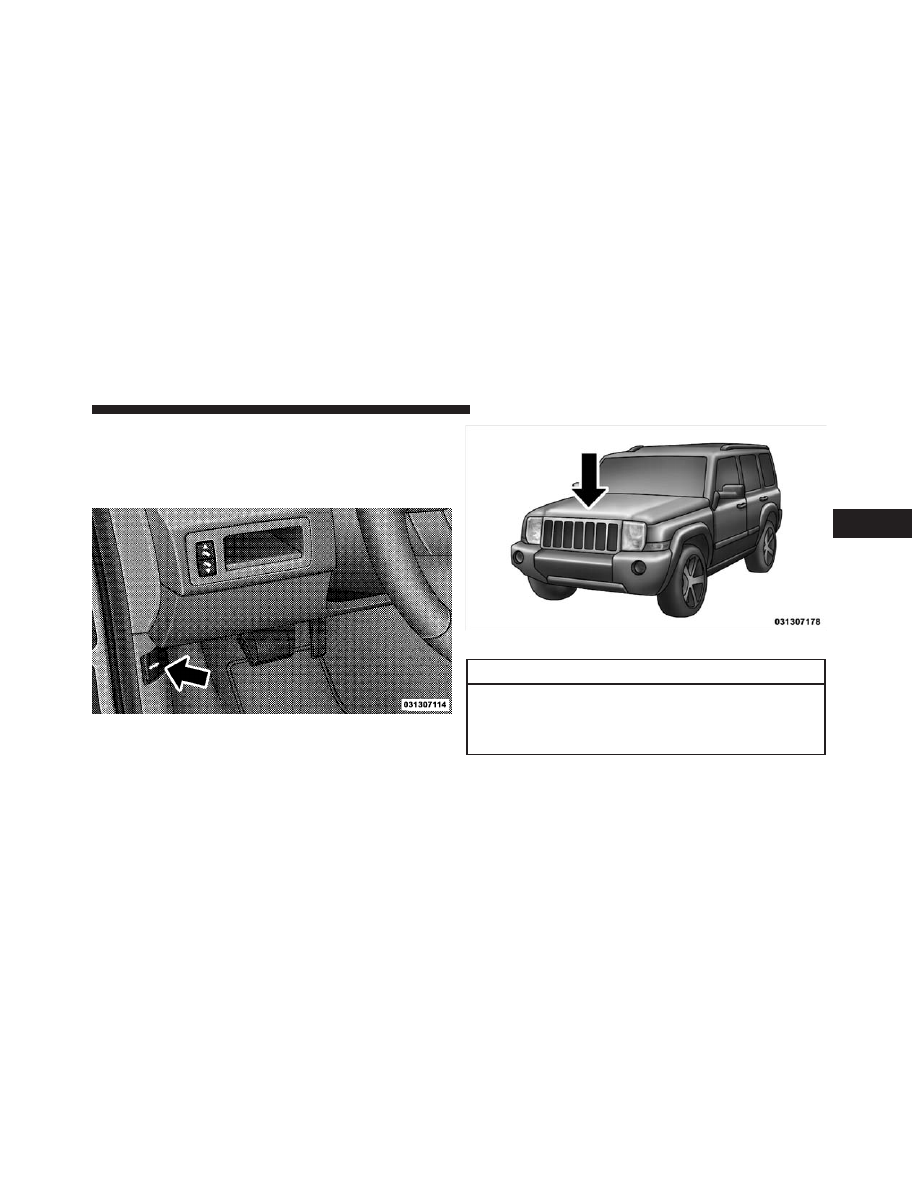
TO OPEN AND CLOSE THE HOOD
To open the hood, two latches must be released.
1. Pull the release lever inside your vehicle located below
the instrument panel and in front of the driver’s door.
2. Reach under the hood, move safety latch to the left
and lift the hood.
CAUTION!
To prevent possible damage, do not slam the hood to
close it. Use a firm downward push at the center of
the hood to ensure that both latches engage.
Hood Release Handle
Underhood Safety Latch
3
UNDERSTANDING THE FEATURES OF YOUR VEHICLE
103
WARNING!
If the hood is not fully latched, it could fly up when
the vehicle is moving and block your forward vision.
Be sure all hood latches are fully latched before
driving.
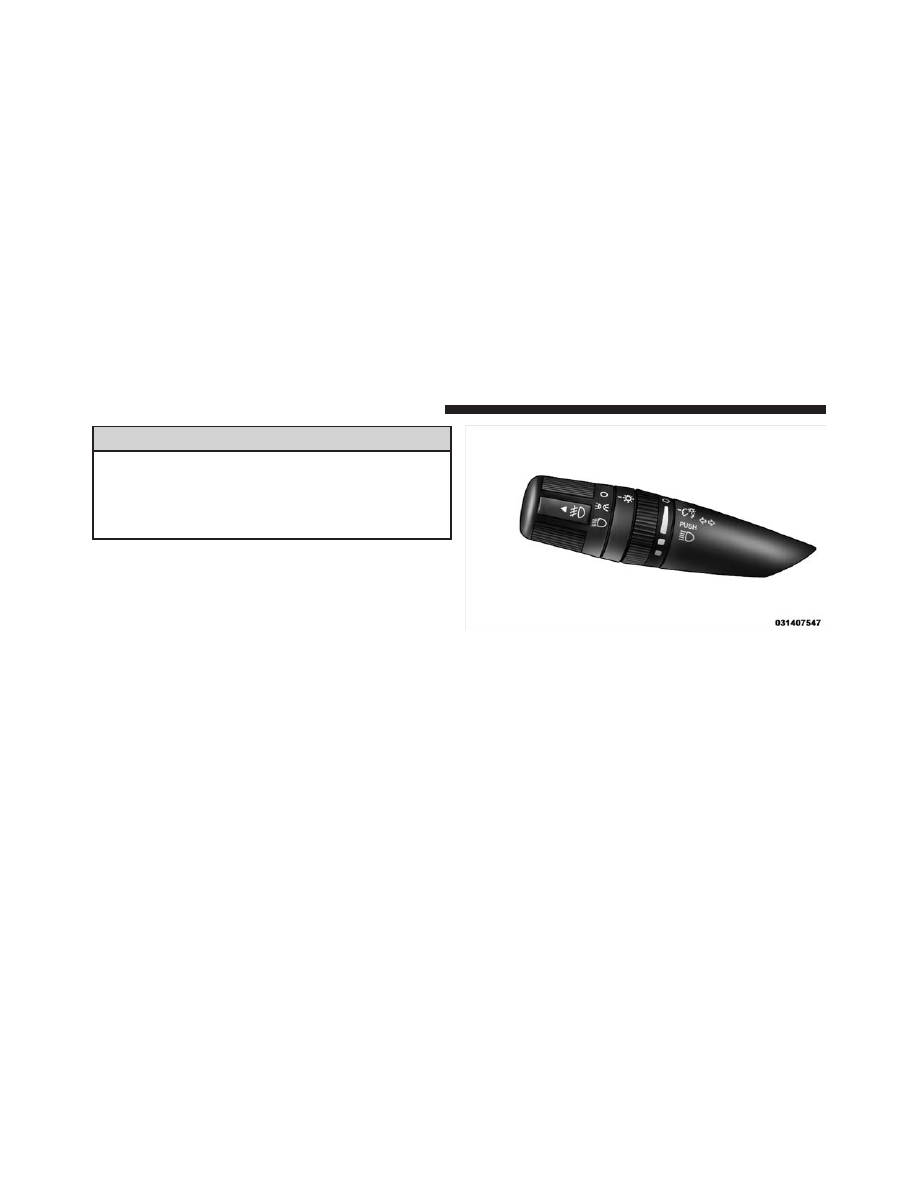
LIGHTS
Multifunction Lever
The multifunction lever controls the operation of the
headlights, turn signals, headlight beam selection, instru-
ment panel light dimming, passing light, interior
courtesy/dome lights and optional fog lights. The mul-
tifunction lever is located on the left side of the steering
column.
Multifunction Lever
104
UNDERSTANDING THE FEATURES OF YOUR VEHICLE
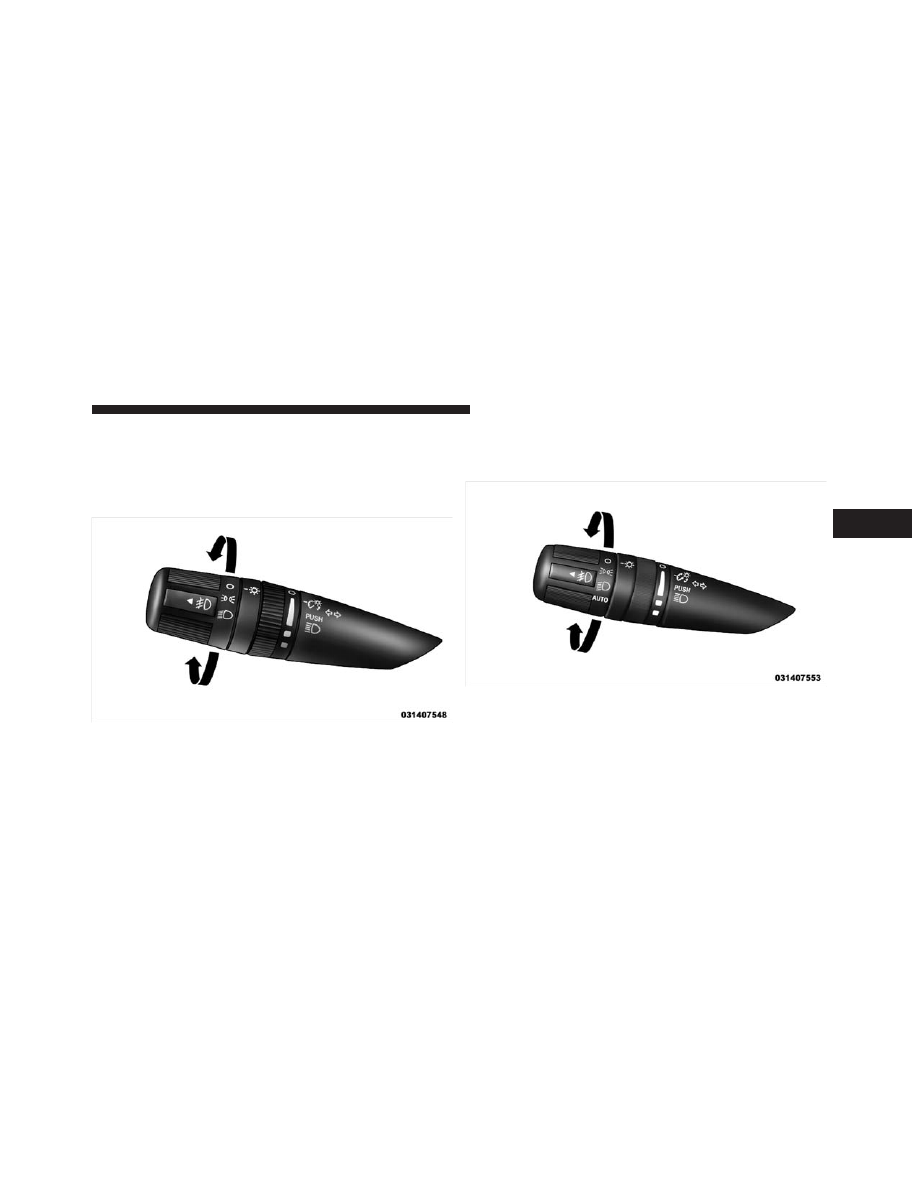
Headlights and Parking Lights
Turn the end of the multifunction lever to the first detent
for parking light operation. Turn to the second detent for
headlight operation. Turn to the third detent for Auto-
matic Headlight operation (if equipped).
Automatic Headlight System — If Equipped
Turn the end of the multifunction lever to the third detent
(AUTO) to activate the Automatic Headlight system.
Headlight Switch
Headlight Switch
3
UNDERSTANDING THE FEATURES OF YOUR VEHICLE
105
This system performs two functions. With the engine
running and the multifunction lever in the AUTO posi-
tion, the headlights will turn on and off based on the
surrounding light levels.
Headlights On Automatically With Wipers
If your vehicle is equipped with Automatic Headlights it
also has this customer-programmable feature. When
your headlights are in the AUTO position, and the engine
is running, they will automatically turn on when the
wiper system is on. Refer to “Headlamps On with
Wipers” under “Electronic Vehicle Information (EVIC) —
Customer-Programmable Features” in Section 4.
If your vehicle is equipped with a “Rain Sensitive Wiper
System,” and it is activated, the headlights will automati-
cally turn on after the wipers complete five wipe cycles
within approximately one minute, and they will turn off
approximately four minutes after the wipers completely
stop. Refer to “Windshield Wipers and Washers” in this
section for more information.
NOTE:
When your headlights come on during the
daytime, the instrument panel lights will automatically
dim to the lower nighttime intensity. Refer to “Instru-
ment Panel and Interior Lights” below for setting the
instrument panel lights to full daytime intensity.
SmartBeam™ — If Equipped
The SmartBeam™ system provides increased forward
lighting at night by automating high beam control
through the use of a digital camera mounted on the
inside rearview mirror. This camera detects vehicle spe-
cific light and automatically switches from high beams to
low beams until the approaching vehicle is out of view.
106
UNDERSTANDING THE FEATURES OF YOUR VEHICLE
NOTE:
If the windshield or SmartBeam™ mirror is
replaced, the SmartBeam™ mirror must be re-aimed to
ensure proper performance. See your local authorized
dealer.
To Activate
1. Select “Auto High Beams” Refer to “Electronic Vehicle
Information Center (EVIC) — Customer-Programmable
Features” in Section 4 of this manual.
2. Turn the end of the multifunction lever to the AUTO
headlight position.
3. Push the multifunction lever away from you (toward
front of vehicle) to engage the high beam mode.
NOTE:
This system will not activate until the vehicle is
at or above 20 mph (32 km/h).
To Deactivate
1. Pull back on the multifunction lever to manually
deactivate the system (normal operation of high beams).
2. Pull back on the multifunction lever once again to
reactivate the system.
NOTE:
Broken, muddy, or obstructed headlights and
taillights of vehicles in the field of view will cause
headlights to remain on longer (closer to the vehicle).
Also, dirt, film, and other obstructions (sticker, toll box,
etc.) on the windshield or camera lens will cause the
system to function improperly.
Automatic Headlight Leveling — HID Headlights
Only
This feature prevents the headlights from interfering
with the vision of oncoming drivers. Headlight leveling
automatically adjusts the height of the headlight beam in
reaction to changes in vehicle pitch.
3
UNDERSTANDING THE FEATURES OF YOUR VEHICLE
107
Daytime Running Lights — If Equipped
The high beam headlights come on at a low intensity
level whenever the engine is running, and the transmis-
sion is not in the PARK position. The lights remain on
until the ignition switch is turned OFF or the parking
brake is engaged. The headlight switch must be used for
normal night time driving.
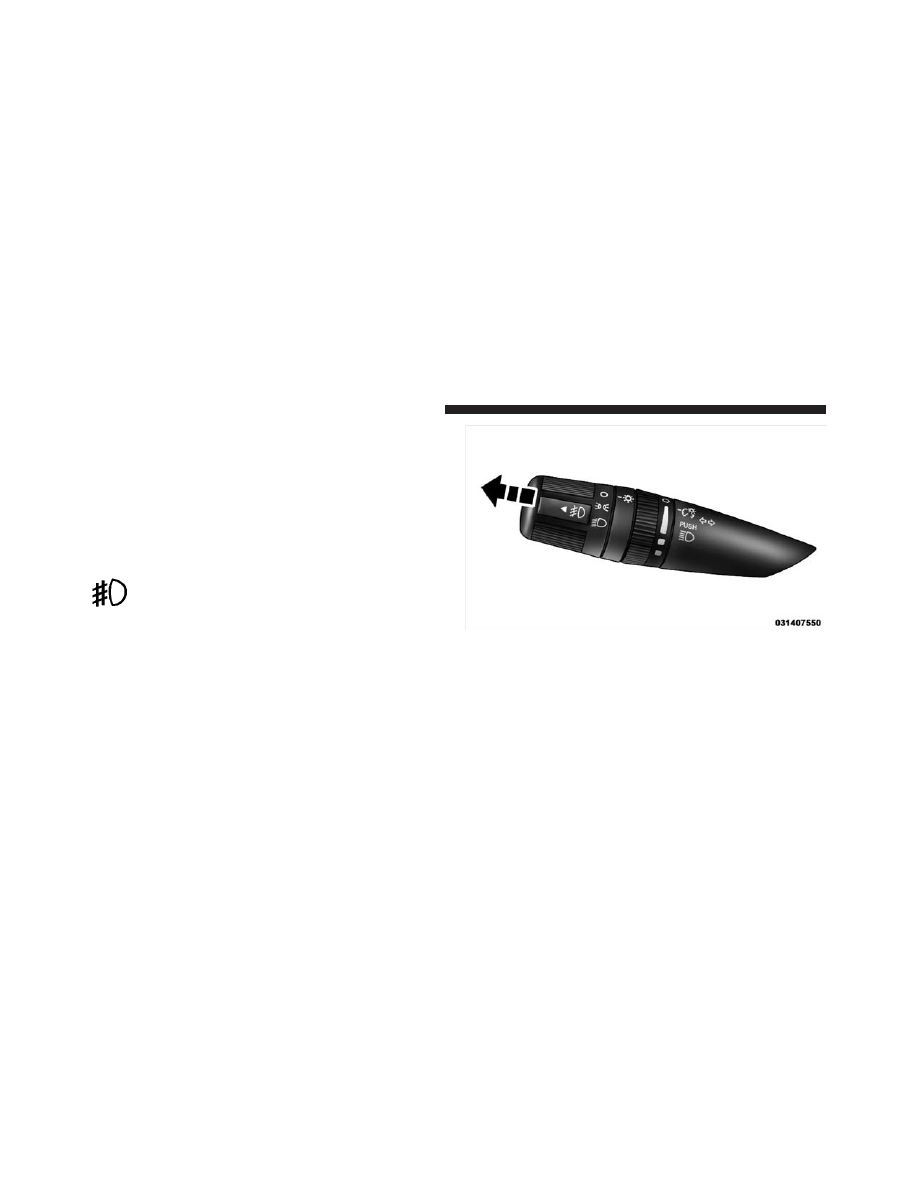
Fog Lights — If Equipped
The fog light switch is located in the multifunction
lever. To activate the fog lights, turn on the park/
turn lights, low beam headlights or Automatic
Headlights and pull out the end of the multifunction
lever. A light in the instrument cluster shows when the
fog lights are on.
NOTE:
• Turning on the high beam headlights turns off the fog
lights.
Front Fog Light Control
108
UNDERSTANDING THE FEATURES OF YOUR VEHICLE
• A front fog light is a lighting device providing illumi-
nation forward of the vehicle under conditions of fog,
rain, snow or dust. The front fog lights supplement the
low beams of a standard headlight system.
• Proper aim and adjustments of the front fog lights
should be made to prevent excessive glare for other
drivers.
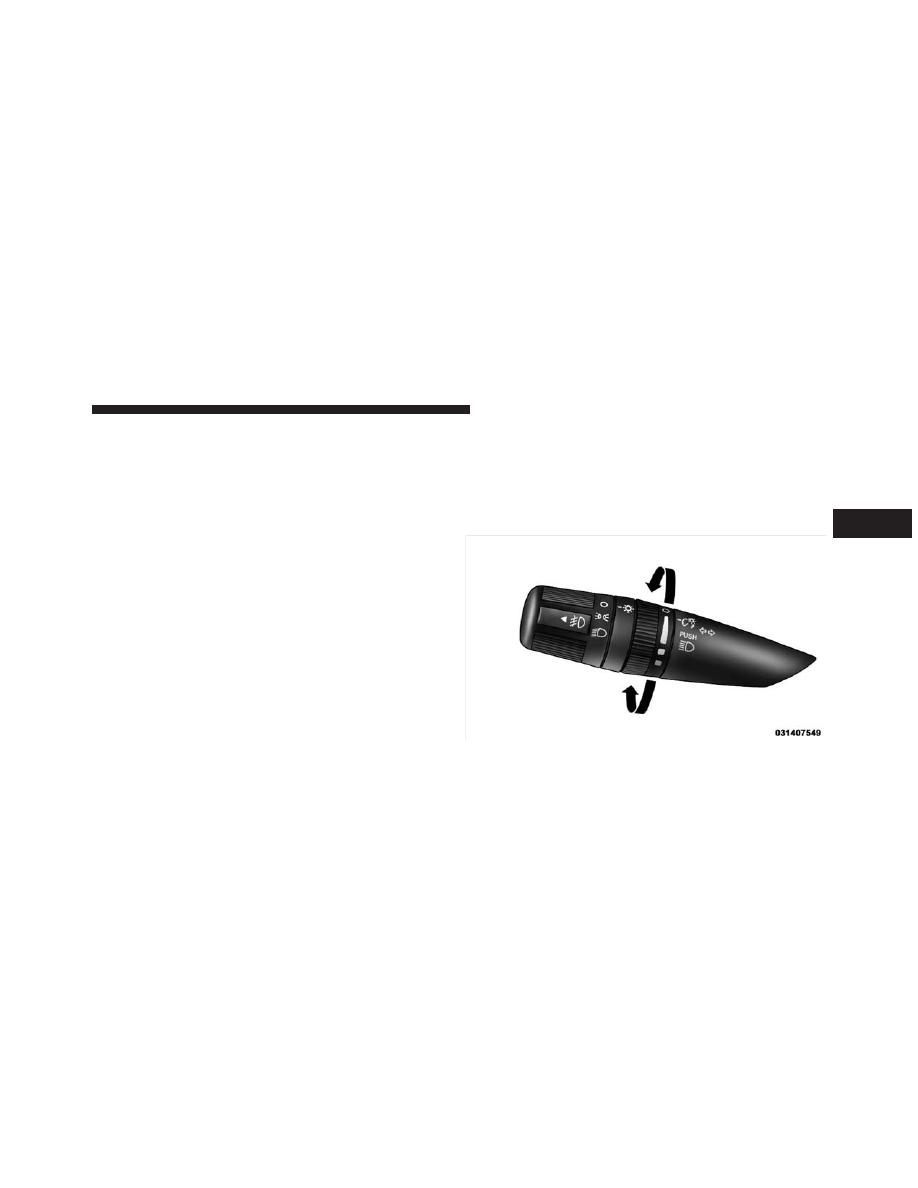
Instrument Panel and Interior Lights
When the multifunction lever is in the parking light,
headlight or AUTO position (if equipped), rotating the
center portion of the lever up and down will increase and
decrease the brightness (dimmer control) of the instru-
ment panel lights. Full daytime brightness on all elec-
tronic displays (odometer, overhead console, radio, and
Automatic Temperature Control (if equipped) is obtained
by rotating the center portion of the control to the first
detent above the dimmer range. Rotating the control to
the second detent above the dimmer range turns the
interior lights on. Rotating the control to the “Off”
(extreme bottom) position disables all the interior lights,
even when the doors and liftgate are open. While in the
“Off” position the instrument panel lighting is at the
lowest light level and may not be suitable for night
driving.
Dimmer Control
3
UNDERSTANDING THE FEATURES OF YOUR VEHICLE
109
Battery Saver Feature — Exterior/Interior Lights
If the multifunction lever is left in the interior light
position, parking light position, or the headlight position
when the ignition switch is moved to the OFF position,
the battery saver feature will automatically turn off the
exterior and interior lights after eight minutes. Normal
operation will resume when the ignition is turned ON or
when the headlight switch is turned to another position.
Lights-On Reminder
If the headlights or parking lights are on after the ignition
is turned OFF, a chime will sound when the driver’s door
is opened.
Turn Signals
Move the multifunction lever up or down and the arrows
on each side of the instrument cluster flash to show
proper operation of the front and rear turn signal lights.
NOTE:
If either light remains on and does not flash, or
there is a very fast flash rate, check for a defective outside
light bulb. If an indicator fails to light when the lever is
moved, it would suggest that the indicator bulb is
defective.
Turn Signal Control
110
UNDERSTANDING THE FEATURES OF YOUR VEHICLE
Lane Change Assist
Tap the lever up or down once, without moving beyond
the detent, and the turn signal (right or left) will flash
three times then automatically turn off.
High/Low Beam Switch
Push the multifunction lever away from you to switch
the headlights to high beam. Pull the lever toward you to
switch the headlights back to low beam.
Flash-To-Pass
You can signal another vehicle with your headlights by
lightly pulling the multifunction lever toward the steer-
ing wheel. This will turn on the high beam headlights
until the lever is released.
Headlight Off Delay
There is also a feature that delays turning off the vehicle
lights for 0, 30, 60 or 90 seconds after the ignition switch
is turned OFF. To activate the headlight delay, the multi-
function lever must be rotated to the “Off” position after
the ignition switch is turned OFF. Only the headlights
will illuminate during this time. Refer to “EVIC —
Customer-Programmable Features” in Section 4 to turn
this feature “On/Off” or set the time interval.
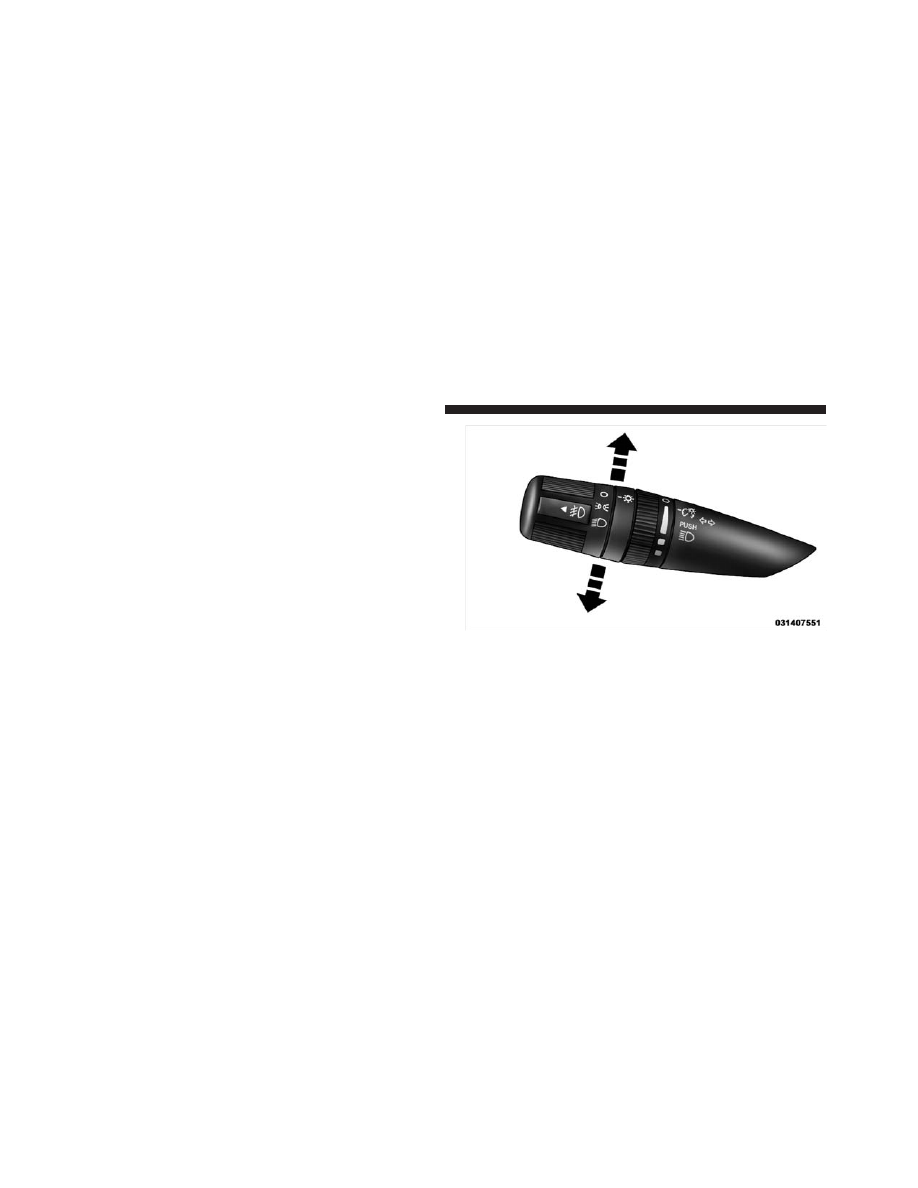
Interior Lights
The interior lighting consists of courtesy lights mounted
below the instrument panel, reading lights located above
the front and rear doors, and a rear cargo light. Opening
a door or turning the center of the multifunction lever to
the extreme up position will activate all interior courtesy
lights.
Courtesy/Reading Lights
Each light can be turned on by pressing the recessed area
of the lens. To turn these lights off, press the recessed area
of the lens a second time. There are also reading lights
located above the rear doors. Each light can be turned on
3
UNDERSTANDING THE FEATURES OF YOUR VEHICLE
111
by pressing the front recessed area of the lens. To turn
these lights off, press the recessed area of the lens a
second time.
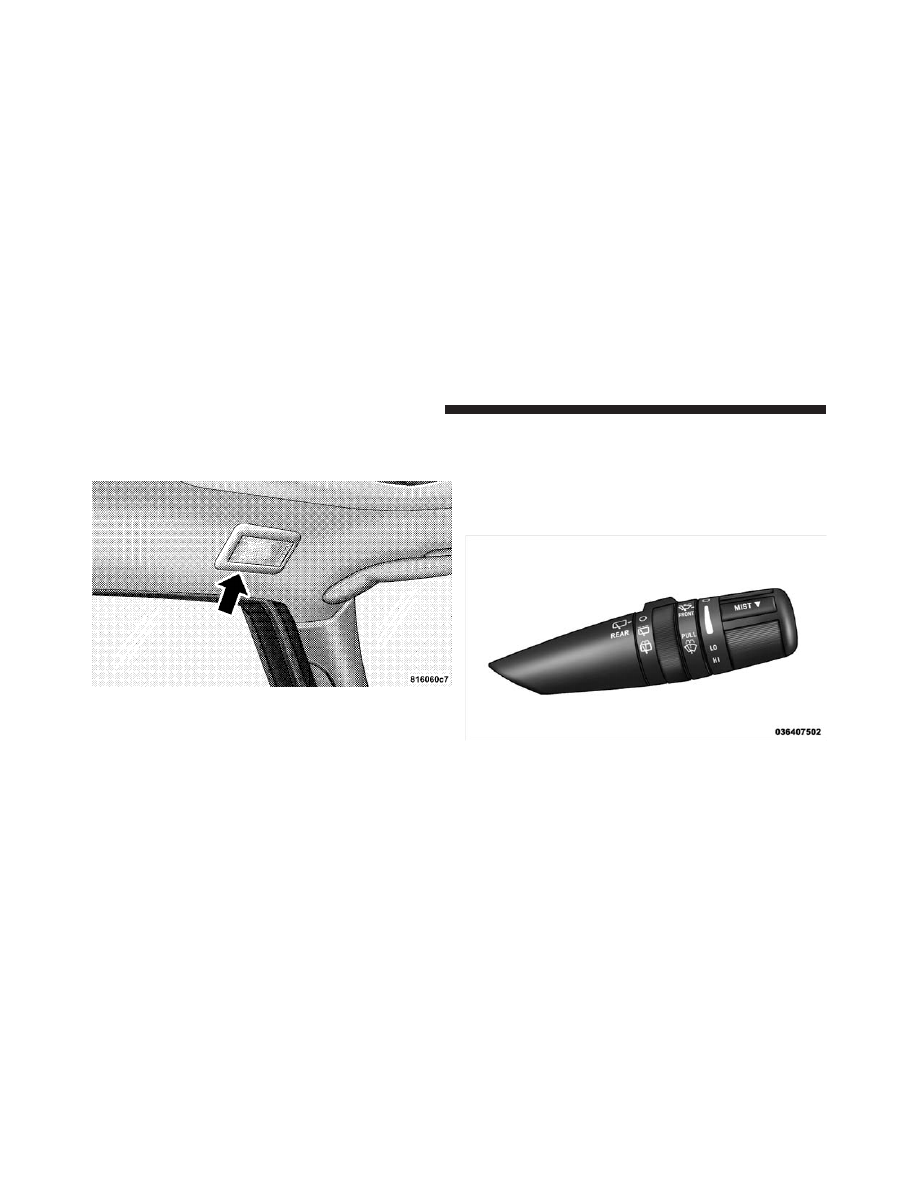
WINDSHIELD WIPERS AND WASHERS
The windshield wiper/washer control lever is located on
the right side of the steering column. The front wipers are
operated by rotating a switch, located on the end of the
lever. For information on the rear wiper/washer, refer to
“Rear Window Features” in this section.
Courtesy/Reading Lights
Windshield Wiper/Washer Switch
112
UNDERSTANDING THE FEATURES OF YOUR VEHICLE
Нет комментариевНе стесняйтесь поделиться с нами вашим ценным мнением.
Текст